Installing Lovelace Plugins
This is a good time to learn how to further expand the Home Assistant ecosystem by using Lovelace Plugins. These Plugins extend our Dashboards with custom cards, entities, rows and various options.
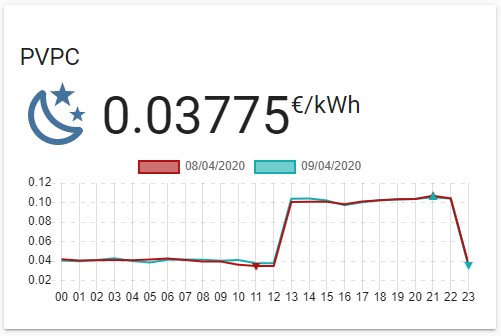
Taking the previous article in which we learn how to integrate the PVPC (Precio Voluntario al Pequeño Consumidor) electric rate, we are going to show the information of the integration in a specific personalized Lovelace card that I have made.
Many Plugins can be installed more easily using HACS, the manual installation process is detailed below.
Download the Plugin
The first thing is to get the Plugin. Usually this is a JavaScript (*.js) file, in our example pvpc-hourly-pricing-card.js.
To do this, access the repository page where the card development is located, typically GitHub. In the example case: https://github.com/danimart1991/pvpc-hourly-pricing-card.
Alternative 1
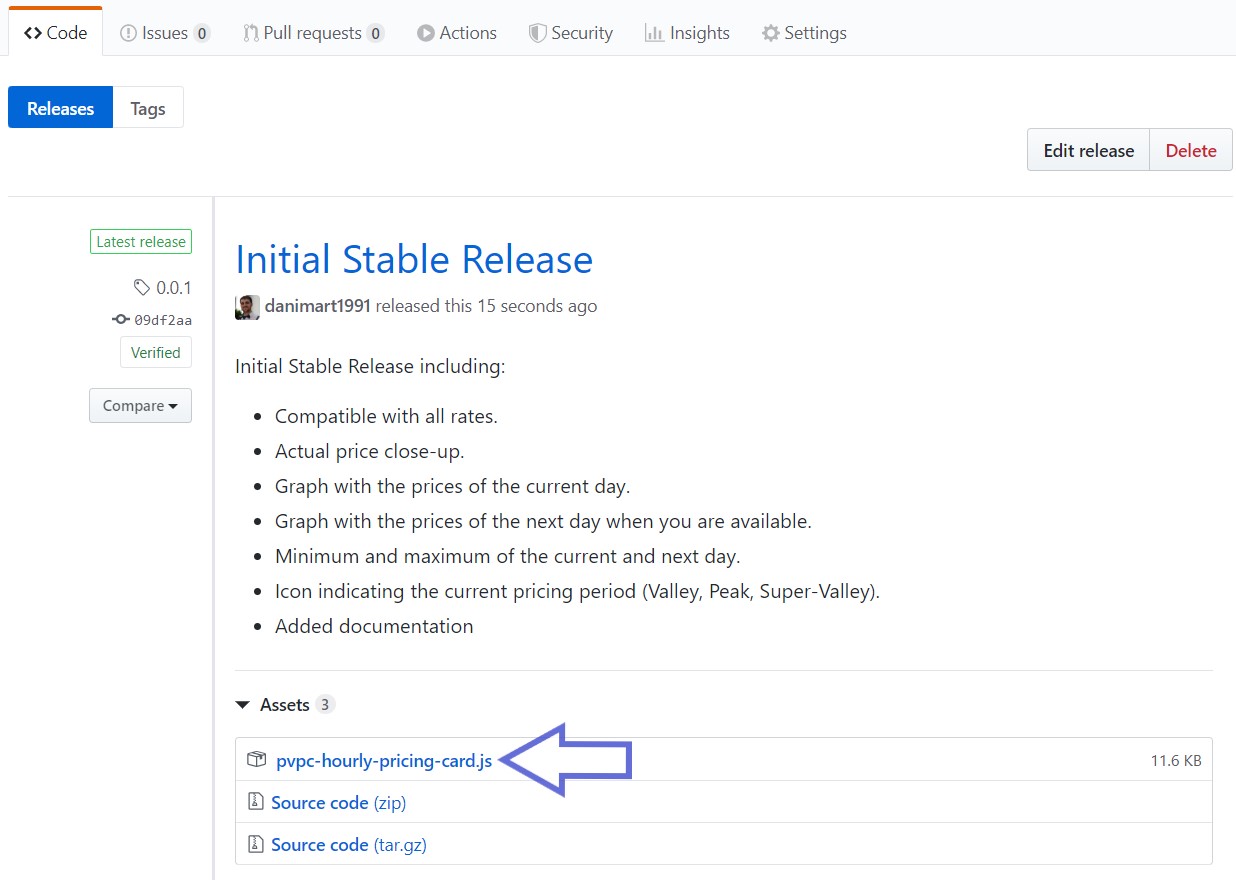
Once inside, many developers perform deployments when they consider that they have a stable version with important changes. This option will be available from the Releases section.
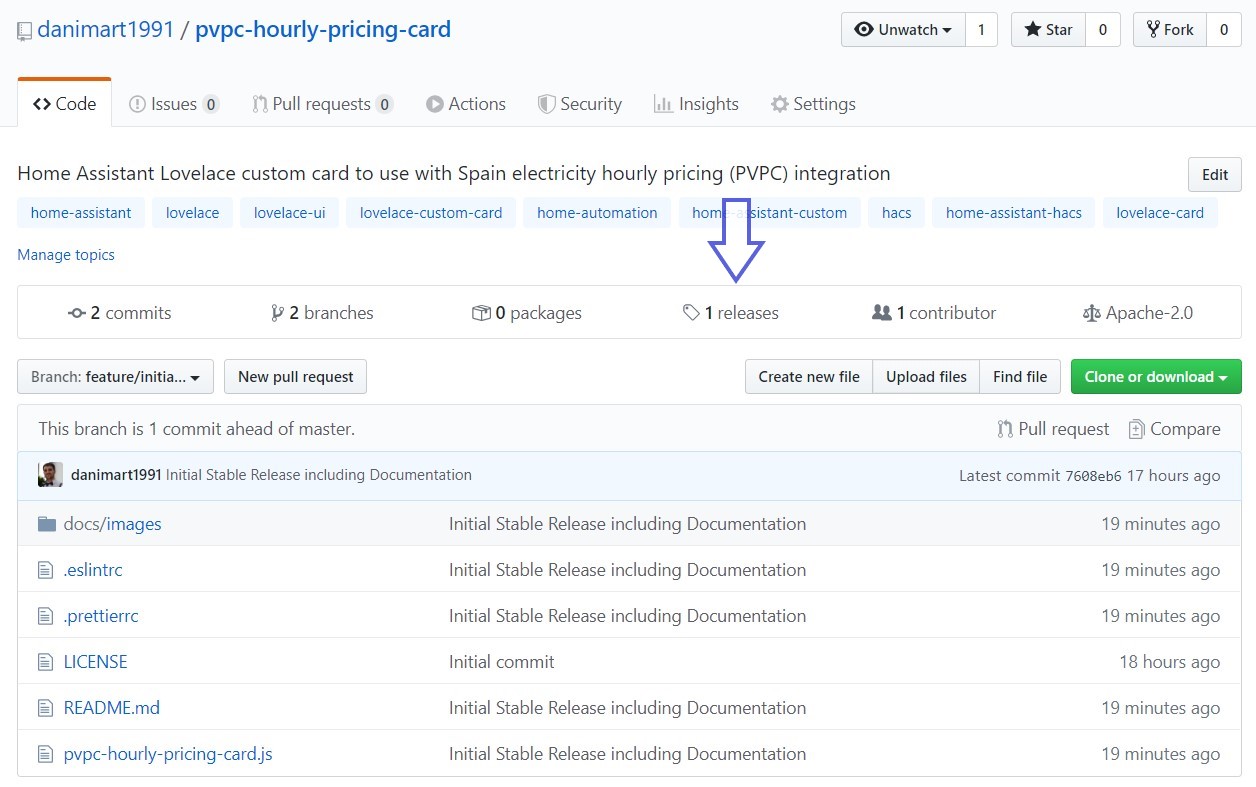
From the Releases page you can download different versions of the JavaScript files.
Alternative 2
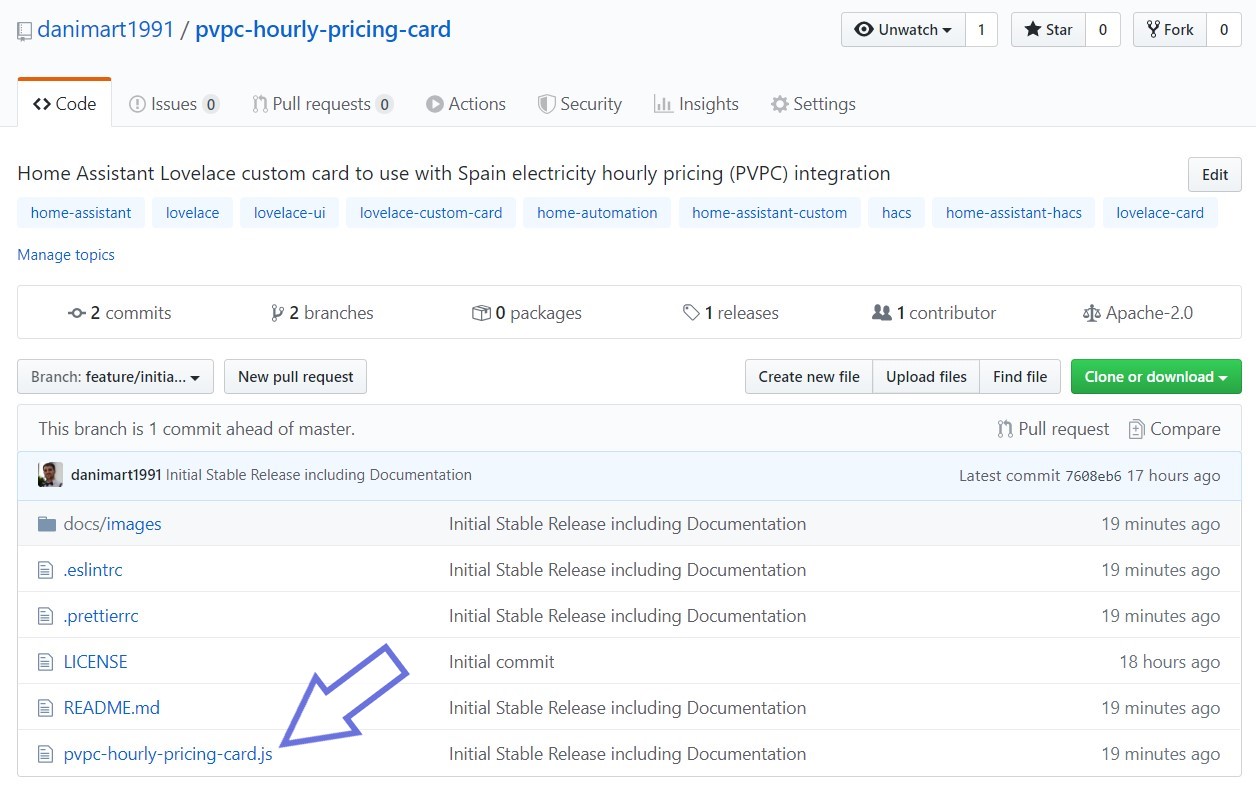
At other times, we’ll have to search the repository for the JavaScript file.
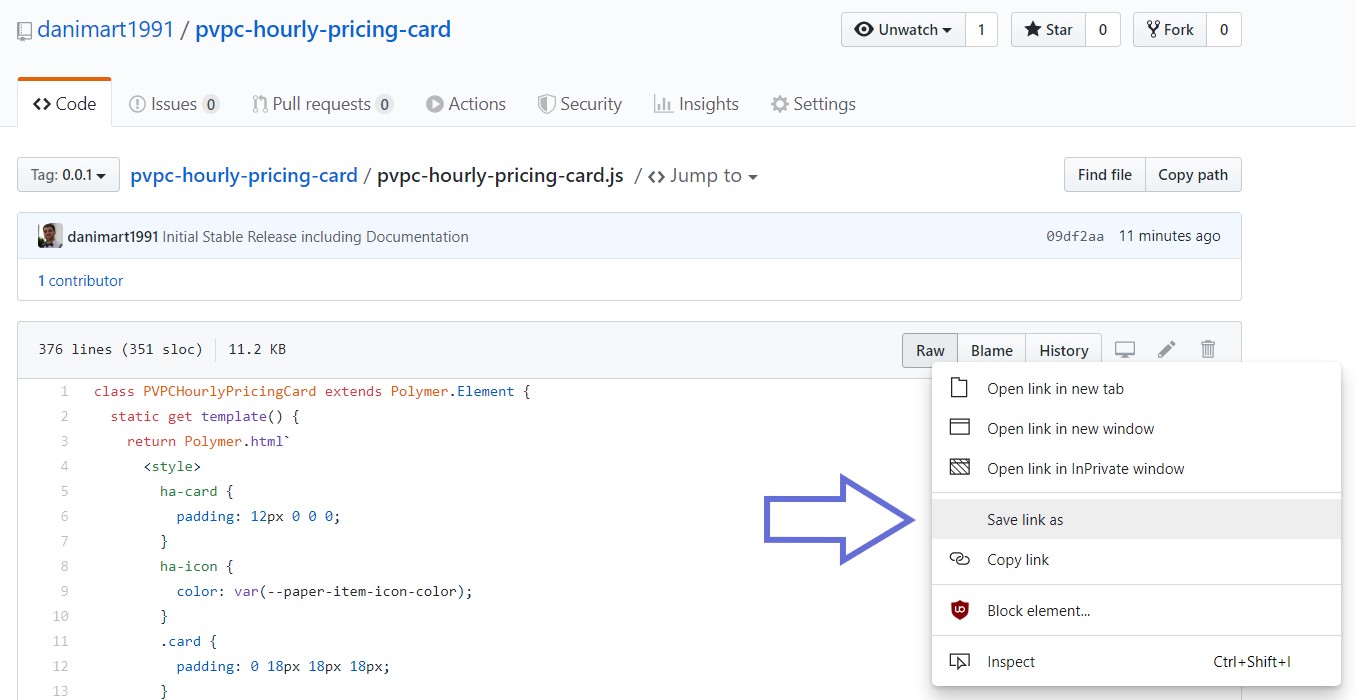
Once inside the file detail page, look for the RAW button, right click on it, and press “Save file as…”.
Installation
Place the file inside the folder of your choice as long as it is inside the /config/www/ folder. For example /config/www/pvpc-hourly-pricing-card.js or /config/www/pvpc-hourly-pricing-card/pvpc-hourly-pricing-card.js.
In Home Assistant 0.107 or higher
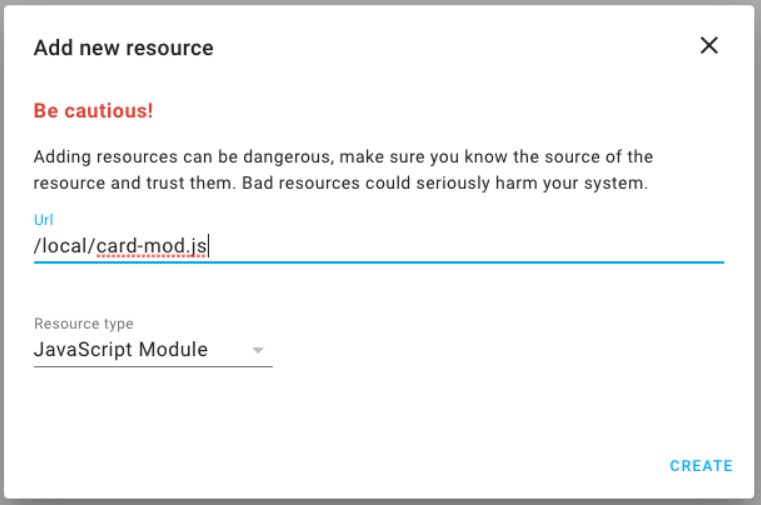
The visual installation is available via the menu Configuration -> Lovelace Dashboards -> Resources.
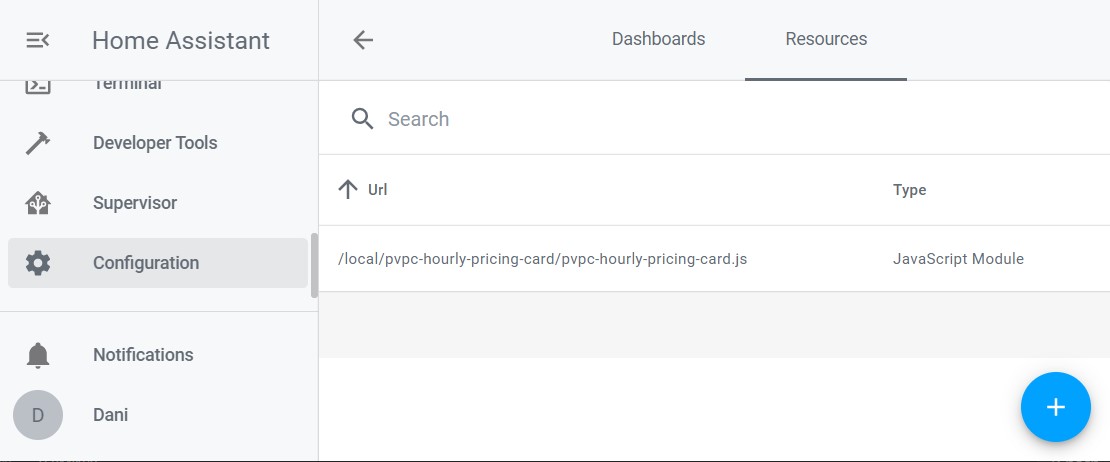
Click on the add (+) button and fill in the data. The url is the address where you have placed the file by replacing /www/ with /local/. Add after the address: ?v=0.0.1.
The alternative is to install the Plugin by including it inside the lovelace node in the configuration.yaml file.
lovelace:
  resources:
    - url: /local/plugins/pvpc-hourly-pricing-card.js?v=0.0.1
      type: module
Refresh the page in your browser.
In earlier versions of Home Assistant 0.107
If you are using Lovelace in Visual mode. You can include the resources from the edit menu (top right) and once again, from the same point, enter the option “Edit RAW configuration”.
title: "Home"
resources:
  - url: /local/pvpc-hourly-pricing-card.js?v=0.0.1
    type: module
views:
  ...
If you are using Lovelace in YAML mode, just add the resources node in the ui-lovelace.yaml file.
Versions
You may have noticed how after each file path I include the text ?v=0.0.1. The version of the deployment must be included to avoid that with each change the browser keeps the previous JavaScript file in cache. That is, when the developer updates the Plugin, it will be necessary to download and replace the old file on our server. When doing this, it is possible that many browsers or even the Home Assistant application use the file saved in the local cache and not the new version, to force the use of the new file, the trick is to change the version when we indicate the path. It doesn’t matter that it’s not real, just that it’s different each time.
Using the Plugin
This is a point that depends a lot on the installed Plugin. It is time to read the available documentation and follow the steps.
Conclusion
Now you can easily extend the functionalities and the interface of Home Assistant and as it is the case, use specific cards to take full advantage of the different integrations.
This and other articles complement the documentation of the GitHub repository where all the configuration of my house is available.