
Integrating a UPS in our server
Our server is still an electronic device, and although we have protected your information by software through backup copies, it is appropriate to also protect the hardware. We do not want the data to be corrupted or any electronic component damaged and we have to replace it due to a power surge or a simple power outage.
UPS (Uninterruptible Power Supplies) arise from this need. In a very brief way, they are batteries that, placed between our electronic devices and the current, not only protect the devices from possible problems in the electrical supply, but also, in the event of a power outage, offer energy for a reasonable time so that we can safeguard the data, shut down the device correctly and avoid problems.
Although, the objective of this article is not to describe what a UPS is, what types exist, what you have to look for when you buy one… but the integration of it in our server to be able to monitor the information it offers and to be able to carry out different functions when we are interested in an automated way. I do recommend analyzing that the UPS we buy can be integrated via USB, since not all of them are.
Although compatible with many brands and models (which we will see later), for this tutorial we are going to integrate the Salicru SPS 900 ONE model using NUT (Network UPS Tools).
NUT Server
NUT (Network UPS Tools) consists of two well-differentiated parts, a software in server mode, which obtains the data from the UPS, and a software in client mode, which displays the data obtained by requesting that information from the server.
We need to know which USB device our server has assigned to the UPS. To do this, in the terminal of the server that is going to manage the UPS, execute lsusb, connect the USB cable from the UPS to the server and launch the command again. We will see a new entry:
...
Bus 002 Device 001: ID 0665:5161 Cypress Semiconductor USB to Serial
...
Take note of Bus (002) and Device (001). With this information we will get the path of the device. Following the example, it would be: /dev/bus/usb/002/001.
Next, and as usual in the blog, we are going to instantiate a Docker container in order to create a service with the purpose we are looking for. In this case, create a Network UPS Tools server.
Execute the following command in a terminal:
docker run -d --name=nut-upsd --hostname=nut-upsd --restart=always --network=host --device /dev/bus/usb/002/001 -e UPS_NAME="server_ups" -e UPS_DESC="Server - Salicru SPS 900 ONE" -e UPS_DRIVER="blazer_usb" -e UPS_PORT="auto" -e API_USER="upsmon" -e API_PASSWORD="123456789ABCDEFGH" -e ADMIN_PASSWORD="123456789ABCDEFGH" -e SHUTDOWN_CMD="echo 'Home has no current. Proceeding to shut down...'" upshift/nut-upsd
We are going to explain each of the parameters that have been used:
docker run -d: Create a container with the following configuration if it doesn’t exist and start it in the background.--name=nut-upsd: The name of the container. It is important because we can have several containers instantiated from the same image.--hostname=nut-upsd: Is the name of the host to use inside the container.--restart=always: Restart the container automatically if it stops. If it is stopped manually, it is only started when the container is manually started or the Docker service is restarted.--network=host: The host network uses the IP address of the server, so a container’s network appears to be the server itself rather than separate.--device /dev/bus/usb/002/001: We give the container access to the USB device that we discovered earlier.-e UPS_NAME="server_ups -e UPS_DESC="Server - Salicru SPS 900: It is the name and description that we want to give to the UPS, in case we have more than one.-e UPS_DRIVER="blazer_usb": The driver that we are going to use with the UPS. Each brand usually has a different driver. Read more below.-e UPS_PORT="auto": Indicates the UPS port if by chance you need a specific port. It is not usually necessary to modify this parameter.-e API_USER="upsmon" -e API_PASSWORD="123456789ABCDEFGH": Indicates the username and password that we want to use for data read-only mode. It is the user that we will use normally.-e ADMIN_PASSWORD="123456789ABCDEFGH": Indicates the password used in administrator mode to perform write functions on the server and the UPS.-e SHUTDOWN_CMD="echo 'Home has no current. Proceeding to shut down...'": script/command to run when battery is VERY low. For example, perform a server shutdown.upshift/nut-upsd: Indicates the image used to mount the container. If no version is indicated, it will take the latest stable version.
To know which UPS_DRIVER to use, you can consult the NUT compatibility list, in case you can’t find it, there is a list of devices tested by the community.
You also have an example for Docker Compose here.
Clients
Once the server is instantiated, we can use any client to query data or perform different functions.
The server container itself includes a client. If we have enough knowledge of Docker, we can do a *Docker Attach *and execute upsd <UPS_NAME> (UPS_NAME is the name of the UPS that we have indicated when instantiating the server). Commands can also be run with upscmd and upsrw.
docker-webnut
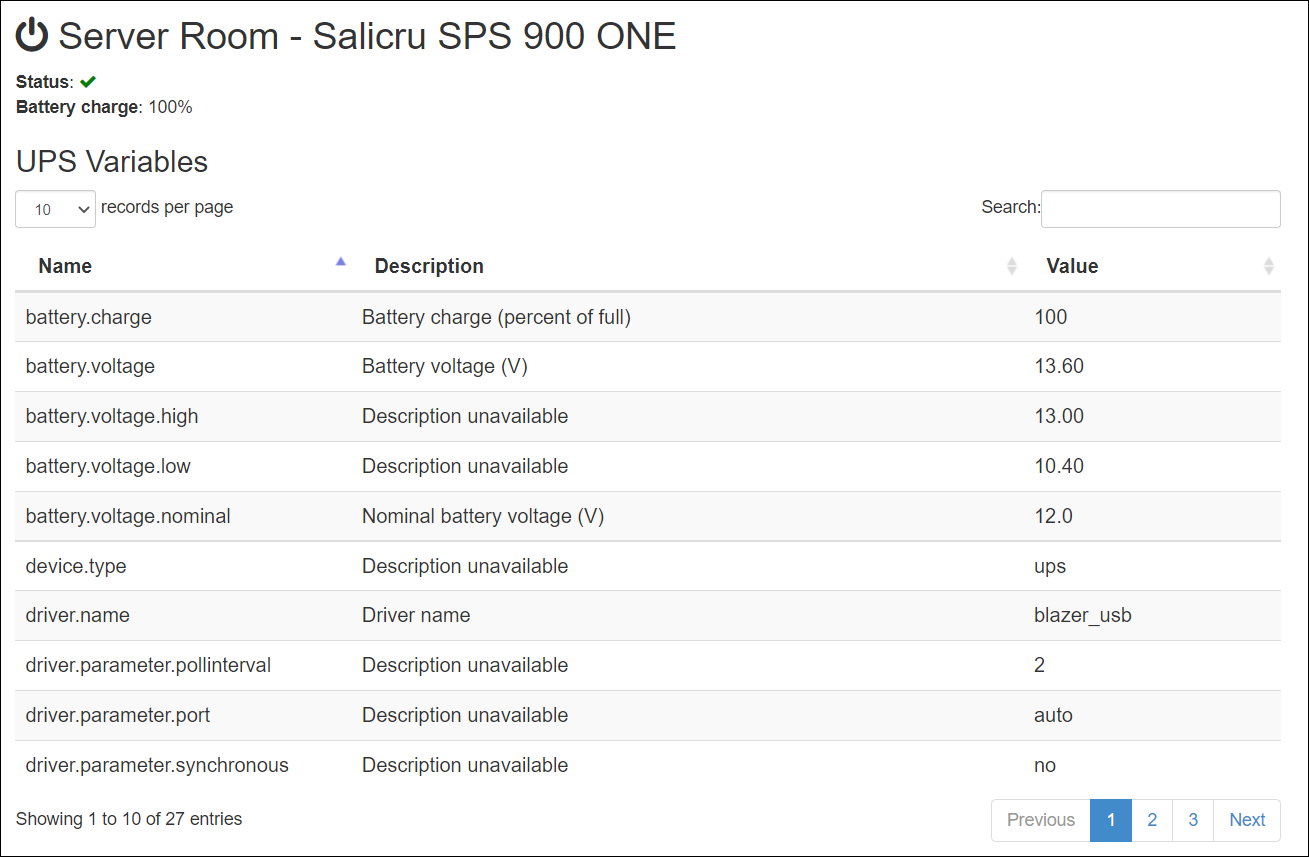
docker-webnut is another simple client for querying data. We can instantiate a Docker container with the following command:
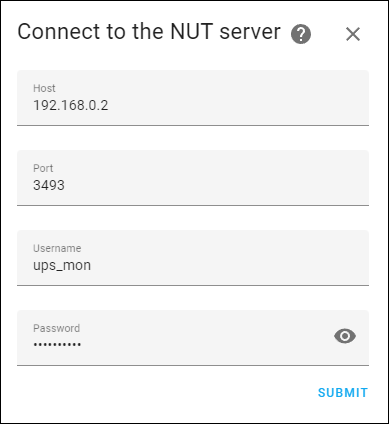
docker run -d --name=webnut --hostname=webnut --restart=always --network=host -e UPS_HOST="<IP_SERVIDOR>" -e UPS_PORT="3493" -e UPS_USER="upsmon" -e UPS_PASSWORD="123456789ABCDEFGH" edgd1er/webnut:latest
We only need to indicate the IP of the machine to which the UPS is connected via USB (in our example, the IP of the server), the username and password that we indicated when instantiating the NUT server, and the port, which is 3493 by default.
Next, we access a Web browser and indicate the address http://<Server_IP>:3494.
nut-webui

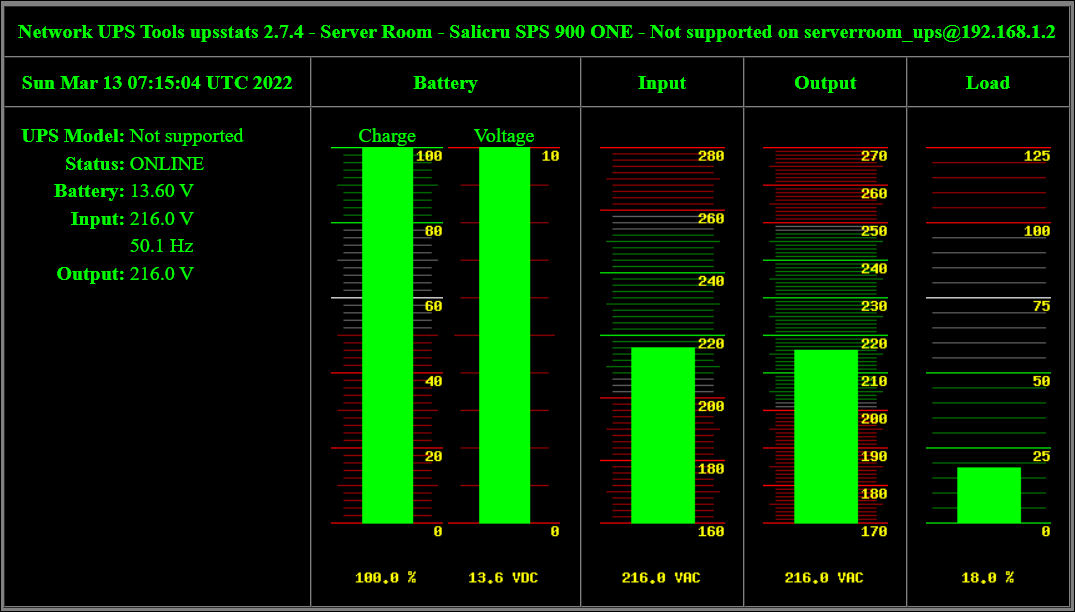
The nut-webui client is somewhat more complex. We need to previously create the files:
upsset.conf- Uncomment the line to have
http://<Server_IP>:6544/cgi-bin/nut/upsset.cgi - User admin, password, the one generated automatically in the Docker Log or indicated in the creation of the NUT server.
- Uncomment the line to have
hosts.conf- Enter the UPS data.
upsstats.htmlupsstats-single.html
Configuration and sample files: https://github.com/gpdm/nut/tree/master/nut-webui/files/etc/nut
And include them in a folder that we will use when instantiating the container with the following command:
docker run -d --name=nut-webui --hostname=nut-webui --restart=always -p 6495:80 -v <PATH_FOLDER_CONFIGURATION_FILES>:/etc/nut gpdm/nut-webui:latest
Next, we access a Web browser and indicate the address http://<Server_IP>:3495.
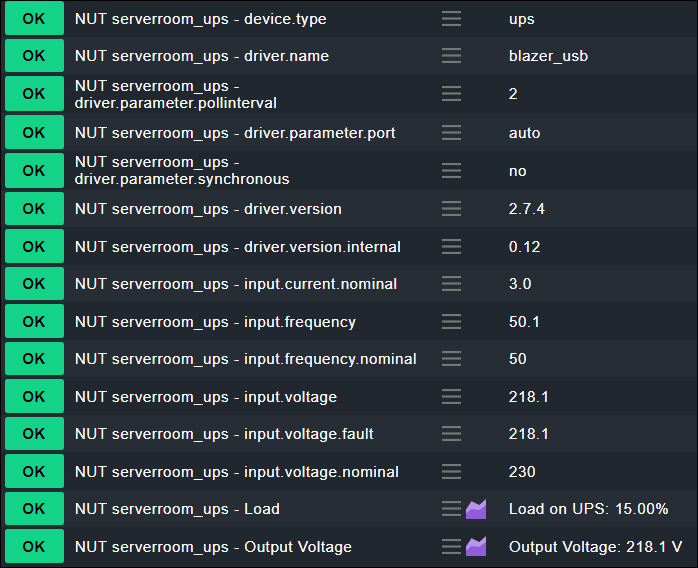
Bonus: HomeAssistant integration
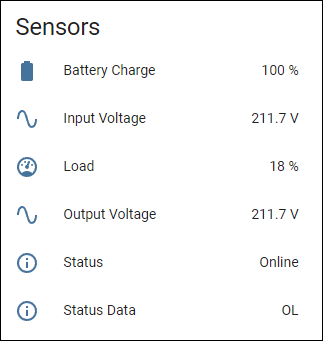
We can use Home Assistant as a client, monitor the values offered by the server and perform different automations depending on the status of the sensors created with these values.
Surely, the automatic detection system of Home Assistant detects NUT in our network, but if it is not the case, it is enough to add the integration from Settings -> Devices & Services -> Add Integration -> Network UPS Tools (NUT).
We indicate the data of our NUT server as we have done in other clients and that’s it.
Bonus 2: CheckMK integration
Although we have not talked about CheckMK in this blog, it is a monitoring and alert system that I use frequently. If you are familiar with it, you may be interested in the following Plugin to monitor UPS data: https://github.com/danimart1991/checkmk_nut