

Meet ESP8266 / NodeMCU, the WIFI module for IoT
Fortunately or unfortunately, the world of IOT is becoming a tangle of devices, services, software and operating systems. This doesn’t have to be bad, in fact these are great news for Makers who want to apply craft solutions to their projects and ideas. However, to some degree, it can become a difficulty chaos to understand, especially for those who are starting.
Today, after a couple of days browsing, I come to present my experience with the most used WIFI module, NodeMCU / ESP8266.
ESP8266 vs. NodeMCU
Before start, we should differentiate these two chips.
ESP8266
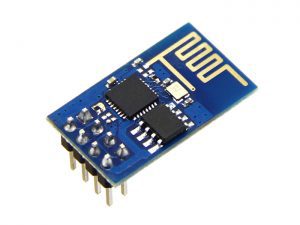
ESP8266 is a WIFI module widely used by the community. Reasons for this, many. From its ease of use, small size, versatility,… Can be used mainly as slave of an Arduino board, or use it on its own with the appropriate firmware.
In fact the ESP8266 module includes a small internal processor that we could program to operate autonomously and even has a pair of General Purpose Input Output (GPIO) ports for use as an activator of some other IOT component.
If you want to know more, I encourage you to visit the forums dedicated to this jewel.
NodeMCU
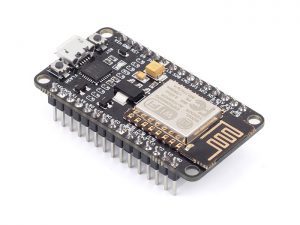
NodeMCU is an Open Source board that facilitates the use of ESP8266 at hardware and software levels. Includes USB connection, IO pins prepared for Breadboard and full access to the ESP8266 chip. And the best of all, at a price of takedown, only 8€ on Amazon. If you are going to but this board, look for the latest vesion available. I leave you a great guide that compares the different versions available.
Its size and versatility makes it perfect for small projects. Since you can connect a battery, USB, sensors… and put everything in a small box.
It is mainly programmed in LUA; LUA scripts are loaded to the micro to load them at the beginning, although we can also interact with it through console with commands in real time. On the other hand, the board is available in Arduino IDE, so we can work as if an Arduino board would be addressed, including programming language and community knowledge.
Starting with NodeMCU
One of the main problems I had when starting with this board is that there is not much help regarding how to start, there are basic tutorials to do small things, but they do not tell you what to do when the NodeMCU board arrives at your house.
The first thing you have to know are the pins that this board brings.
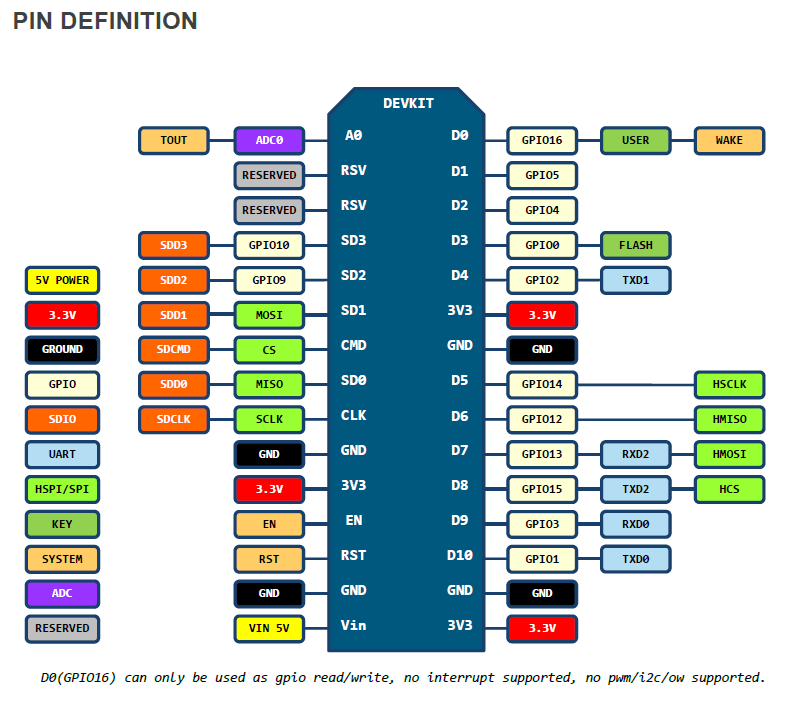
Not many, but very useful. As we see it has several IO pins and ways to give current to the device. The simplest is to use a USB-microUSB cable. Although transformers and batteries can be used to make the device more autonomous yet.
We also need download and install the following:
Once we have installed everything we can begin to touch the shield.
Install Firmware
While this step is to some extent optional, it is advisable to know how to install firmware in our devices, as well as to know how firmwares management works.
Currently the recommendation by the team of NodeMCU is to use NodeMCU PyFlasher, although the results I have had are not the most satisfactory, and therefore, in the previous step has installed the NodeMCU Flasher tool, which although obsolete, works perfectly.
With this tool you can install different firmware in our device. These firmware can be made to our liking; The reason, the available space in the shield is very limited and it is convenient to include only the parts that interest us. For this, different modules have been created whose description can be consulted in theofficial documentation.
Several tools can be used to create our custom firmware. I recommend NodeMCU custom cloud builds. A tool that will generate compilations in the cloud and in which we can customize as we want several important parameters.
Once we have generated our firmware, we will have two files available with extension .bin, integer and float. The difference between them is in the type of operations that can be performed. In the integer version, you can only perform operations with integers and in the float operations with integers and numbers in floating point. The integer version is more restricted but takes up less memory and consumes less resources. It is not a question of life or death. You can install the integer firmware version, and if you need the float. The installation time is not so high.
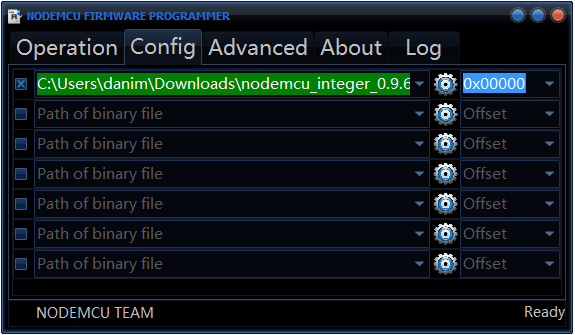
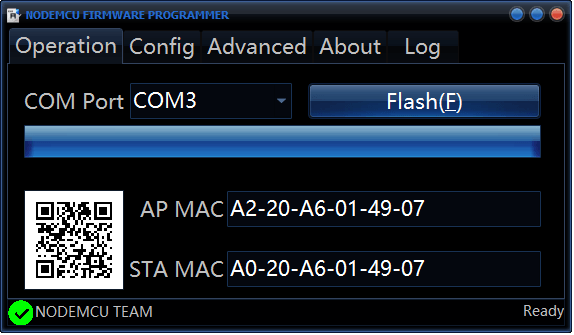
Open NodeMCU Flasher and select the COM port where the device is connected to USB. How to know which port COM is? We go to System -> Device Manager -> Ports (COM and LPT) and look for our device. Following the name, we will have in parentheses the port to which it is connected.
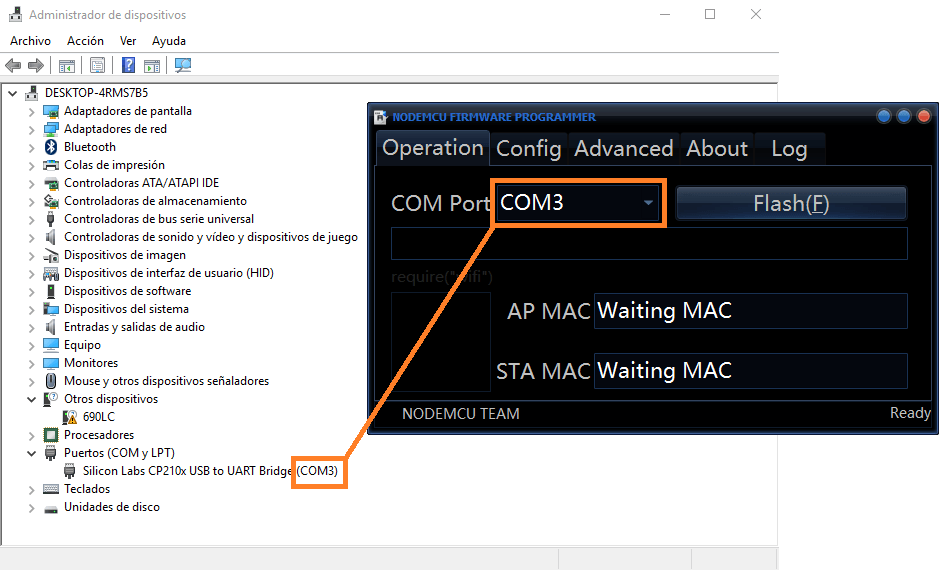
In the Config tab, click on the first gear in the list and select the firmware that you want to install.
Return to the Operation tab and click on Flash (E). If the operation has been successful, you will see the next screen and? We can start using your NodeMCU. I recommend restarting the device after the operation.
Getting Started
At last, after all this introduction, we can get into the pot.
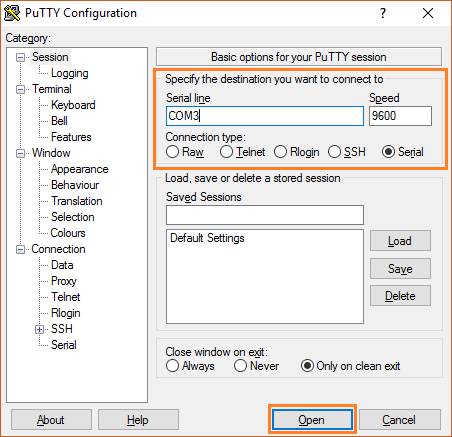
To test, we’re going to use Putty to introduce commands to the board. All these commands work in real time, if for some reason the board will restart or disconnected from the current, all changes would be lost.
Open Putty, serial mode, indicate the port, 9600 baud rate and click open. If all went well, NodeMCU will welcome us.
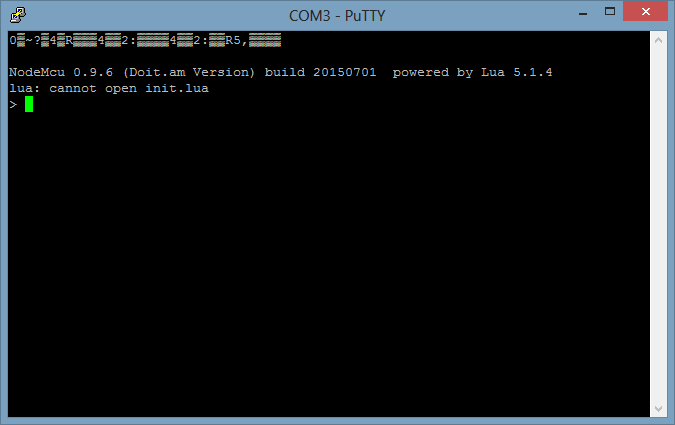
We can now enter commands. Here are some examples for you to try:
Example 1 (Turning a led on and off)
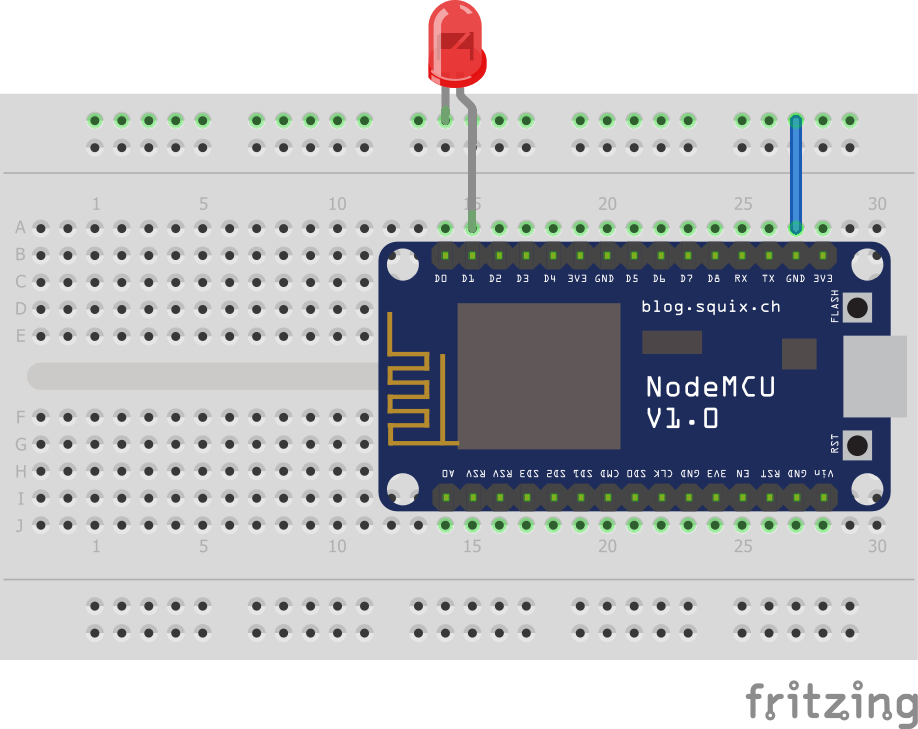
gpio.mode(1,gpio.OUTPUT) -- Set the pin for pulse output
gpio.write(1,gpio.HIGH) -- The LED turns off
gpio.write(1,gpio.LOW) -- The LED turns on
gpio.write(1,gpio.HIGH) -- The LED turns off
Example 2 (WIFI client mode)
Connect to a WIFI network in client mode to perform tasks such as making a call to a server.
print(wifi.sta.getip()) --nil
wifi.setmode(wifi.STATION)
wifi.sta.config("SSID","password") -- Replace SSID and password with your home settings
print(wifi.sta.getip()) --192.168.1.43
Example 3 (Temperature and humidity with DHT11 / DHT22)
For this example, make sure you have dht library included in the Firmware.
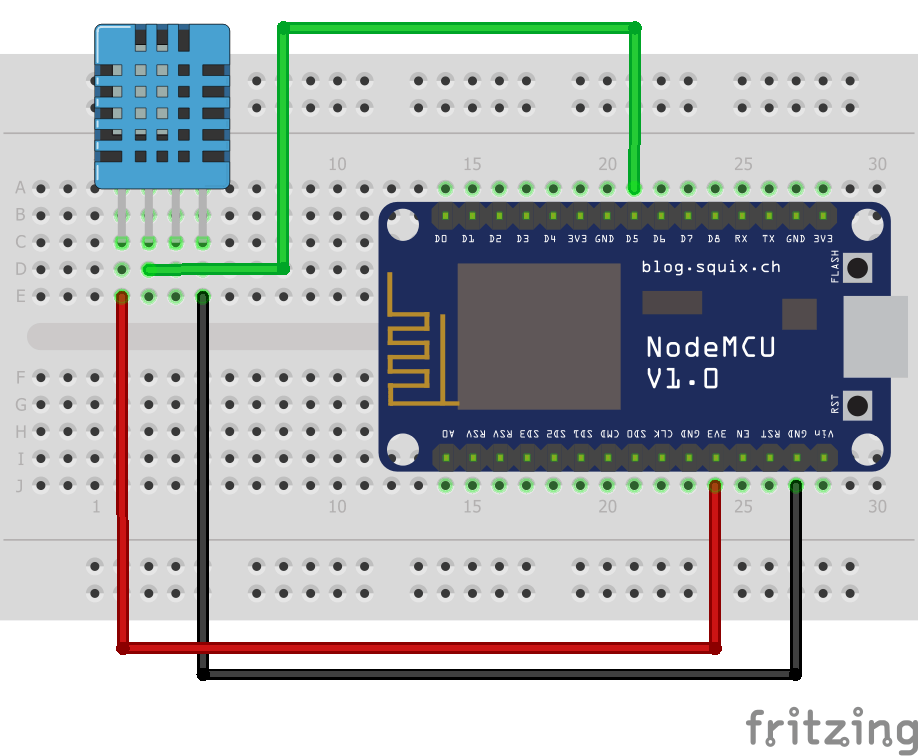
The following code blocks the board execution thread due to the infinite loop. In order to stop it, it is necessary to restart the board.
while 1 do
    status,temp,hum,tempDec,humDec = dht.read(5) -- We read the data and put it in variables
    if(status == dht.OK) then
        print("temperature: "..temp)
        print("humidity: "..hum)
        print("temperature in decimals: "..tempDec)
        print("humidity in decimals: "..humDec)
    end
    tmr.delay(10000000) -- Wait 10,000,000 us = 10 seconds
end