No more advertising on your network with Pi-hole
Many of us have some kind of advertising blocker in our web browsers (Adblock, uBlock…). One of the biggest problems that this solution poses is the difficult installation of these same blockers in some devices such as Smart TVs, or that for example in mobile, the blocking is only done at the browser level, but not at the level of the rest of the applications.
In addition, there are other annoying components such as malware and telemetry that many programs or web pages use too often and are difficult to avoid.
A far more effective way to avoid all this unpleasant content is to use blockers that act at the network level and not just on each device. This way we save on setting up all the devices in the house and make sure our network is clean. Thanks to JASimancas (José Antonio Simancas), I was able to meet and test Pi-hole, one of the most used.
Using a Raspberry Pi, let’s set up from scratch: Raspberry Pi OS + Pi-hole + Recommended lists.
Requirements
- A Raspberry Pi
- A SD Card
- A computer to create an image on the SD card.
- (Recommendation) Connect a network cable to the Raspberry Pi.
Installing Raspberry Pi OS
The first thing is to install Raspberry Pi OS (formerly Raspbian) on the Raspberry Pi. If you have another Linux-based operating system or another device already configured, you can skip to the next section directly.
Steps:
-
Download Raspberry Pi Imager compatible with your computer’s operating system.
Although the article will use Raspberry Pi Imager for Windows. All versions are similar.
-
Insert the SD card in your computer.
-
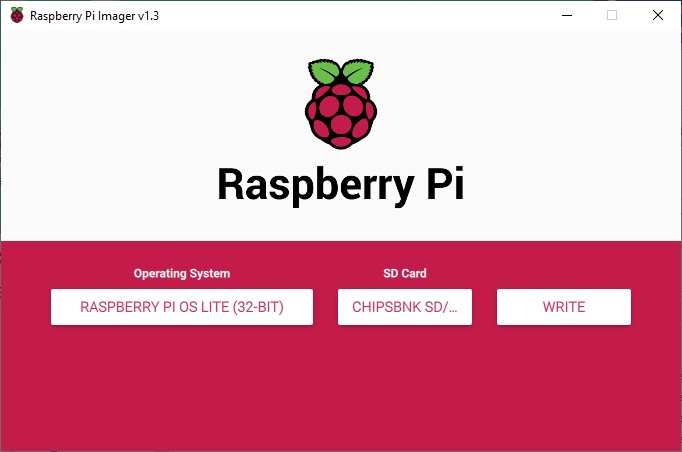
Install and open Raspberry Pi Imager and select the Operating System of your choice:
Raspberry Pi OS (32-bit) With graphic environment Raspberry Pi OS Lite (32-bit) Without graphic environment (The one I will use in this article) Raspberry Pi OS Full (32-bit) With graphic environment and recommended applications -
Select the SD card and click Write.
-
Once finished, open with the file explorer the recently recorded card and inside create a file called
sshwithout extension or content.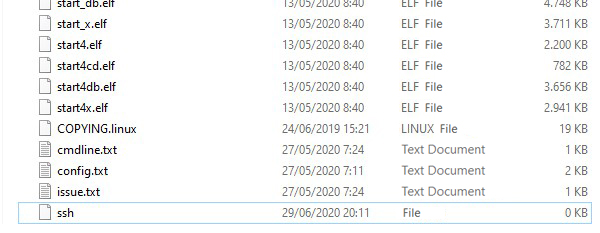
-
Insert the SD card into the Raspberry Pi and plug it into the power supply.
-
Let a few minutes pass and from the computer, try to connect via SSH using the IP assigned automatically by the Router or with
raspberrypi.localusing the userpi. The default password israspberry.C:\Users\danimart1991> ssh pi@192.168.1.204 password: raspberry -
Once inside, execute the command
sudo raspi-config.- Select Update to update the repositories and the system.
- Select Change User Password to change the pi user password to a more secure one.
-
Run
sudo rebootto restart the Raspberry and apply the changes..
Installing Pi-hole
Then, to install Pi-hole, simply run the following command and follow the steps.
curl -sSL https://install.pi-hole.net | bash
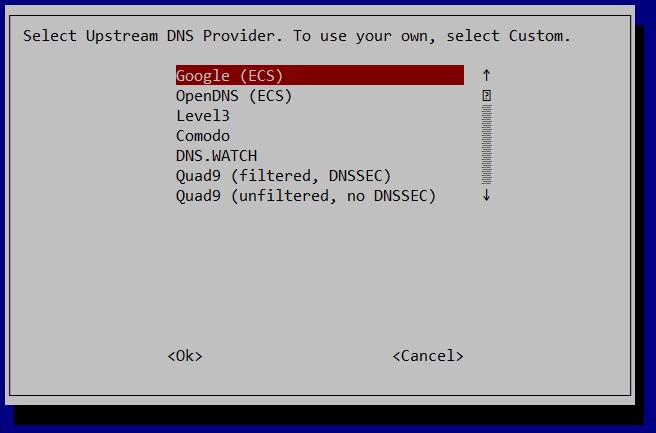
The first is to select the DNS provider, that is, Pi-hole will capture the requests made on our network and use this provider to resolve the addresses on the corresponding IP by filtering out the malicious ones. Either option is good.
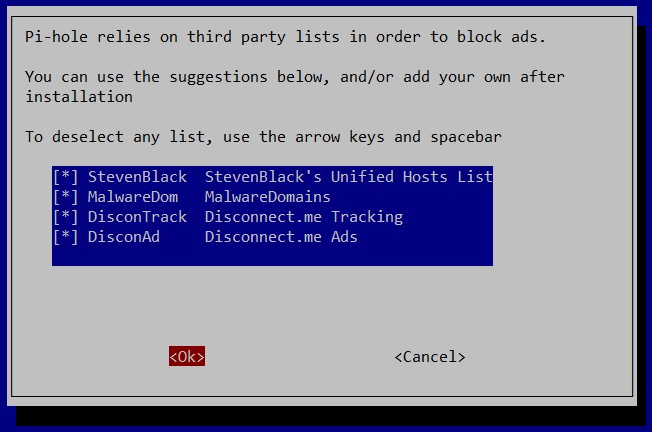
Accept the default lists (we will change them later).
Then accept the IPv4 and IPv6 blocking.
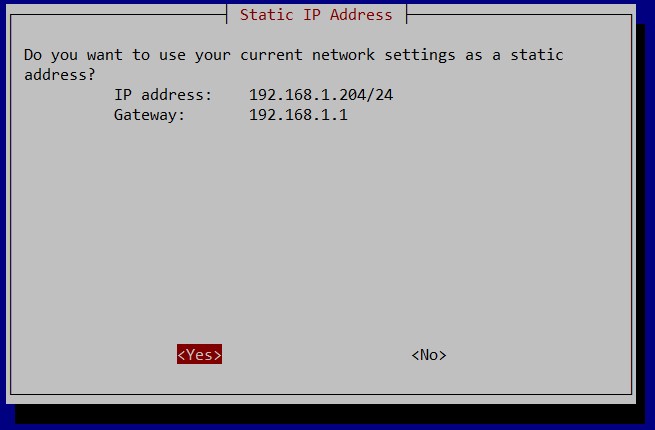
And on the next screen, VERY IMPORTANT, choose the static (fixed) IP you want to use on the Raspberry Pi. This IP will then be used as the DNS provider on the rest of the devices.
You can use the default one or change it for another one. For the article, 192.168.1.3 has been selected.
Indicate on the subsequent screens:
- You want to use the web interface for administrators. (Option 0)
- Activate the Web server. (Option 0)
- Keep a record of queries. (Option 0)
- Show all in FTL privacy mode. (Option 0)
Wait a bit…
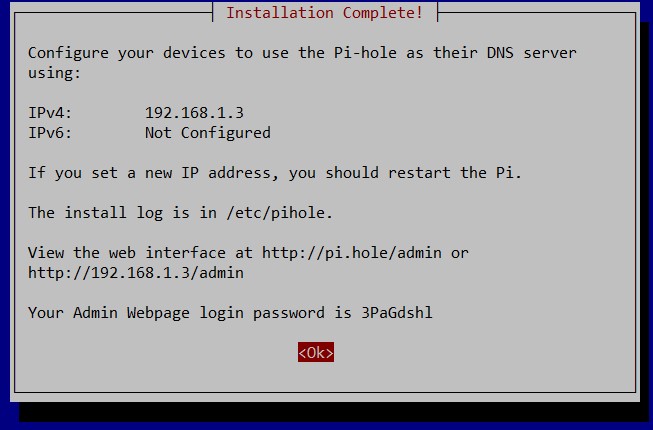
The last window will show you the information of the DNS server created, as well as the data to access the Web client and its password. Write down everything.
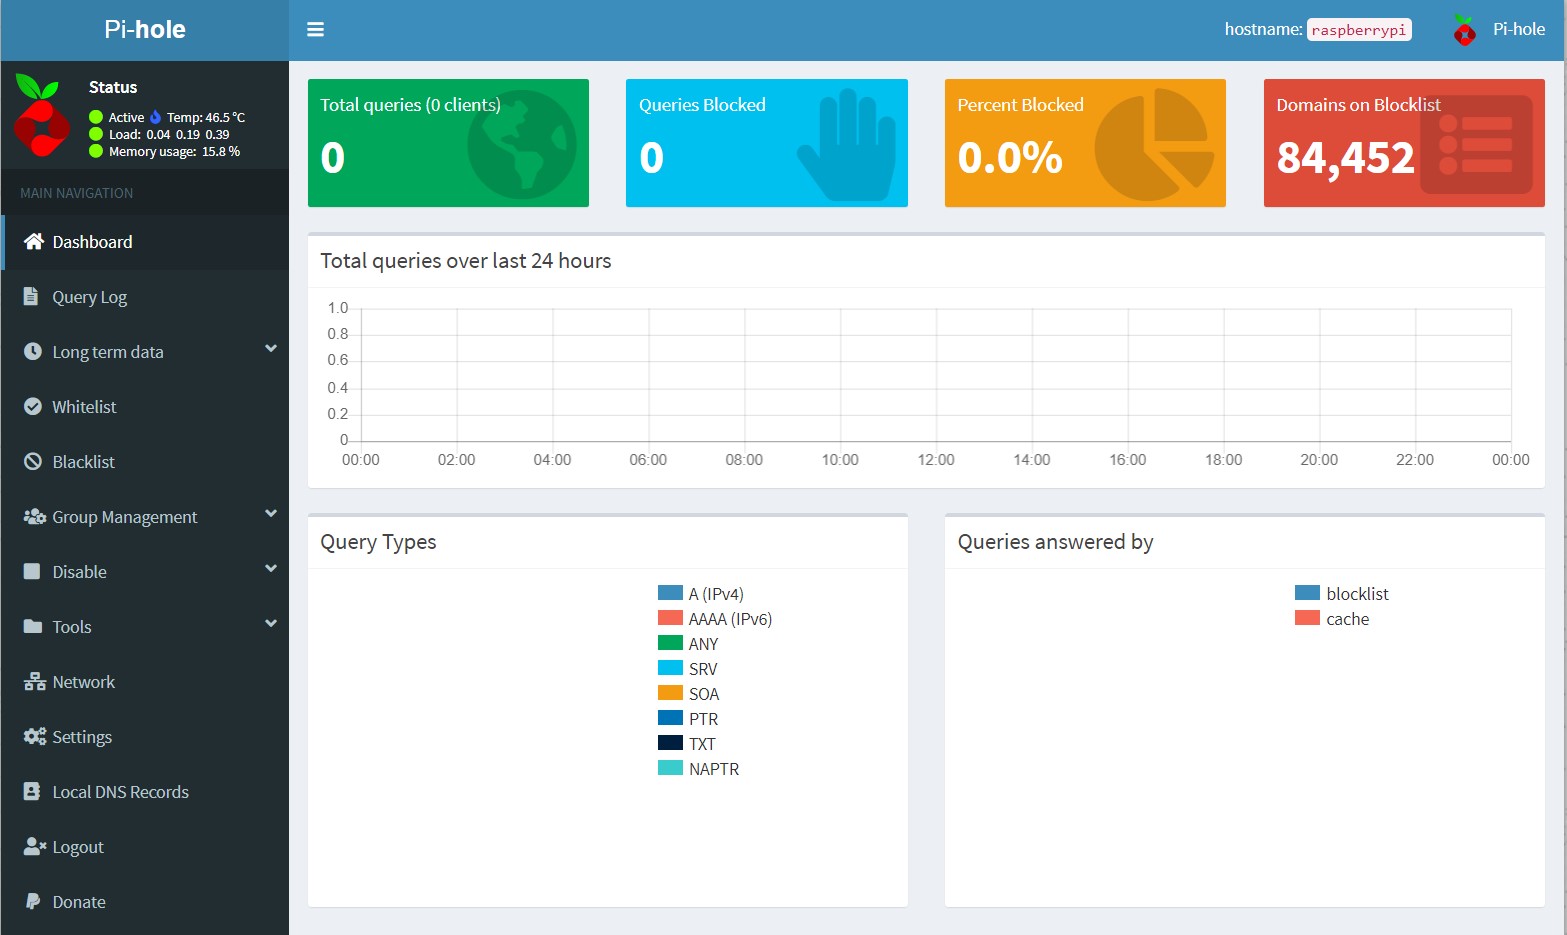
Pi-hole Admin Console
From now on, the rest of Pi-hole’s configuration can be done from the web panel available at the web address the installation have indicated in the previous window (http://192.168.1.3/admin). you can access it from a browser and enter the password by clicking on Login.
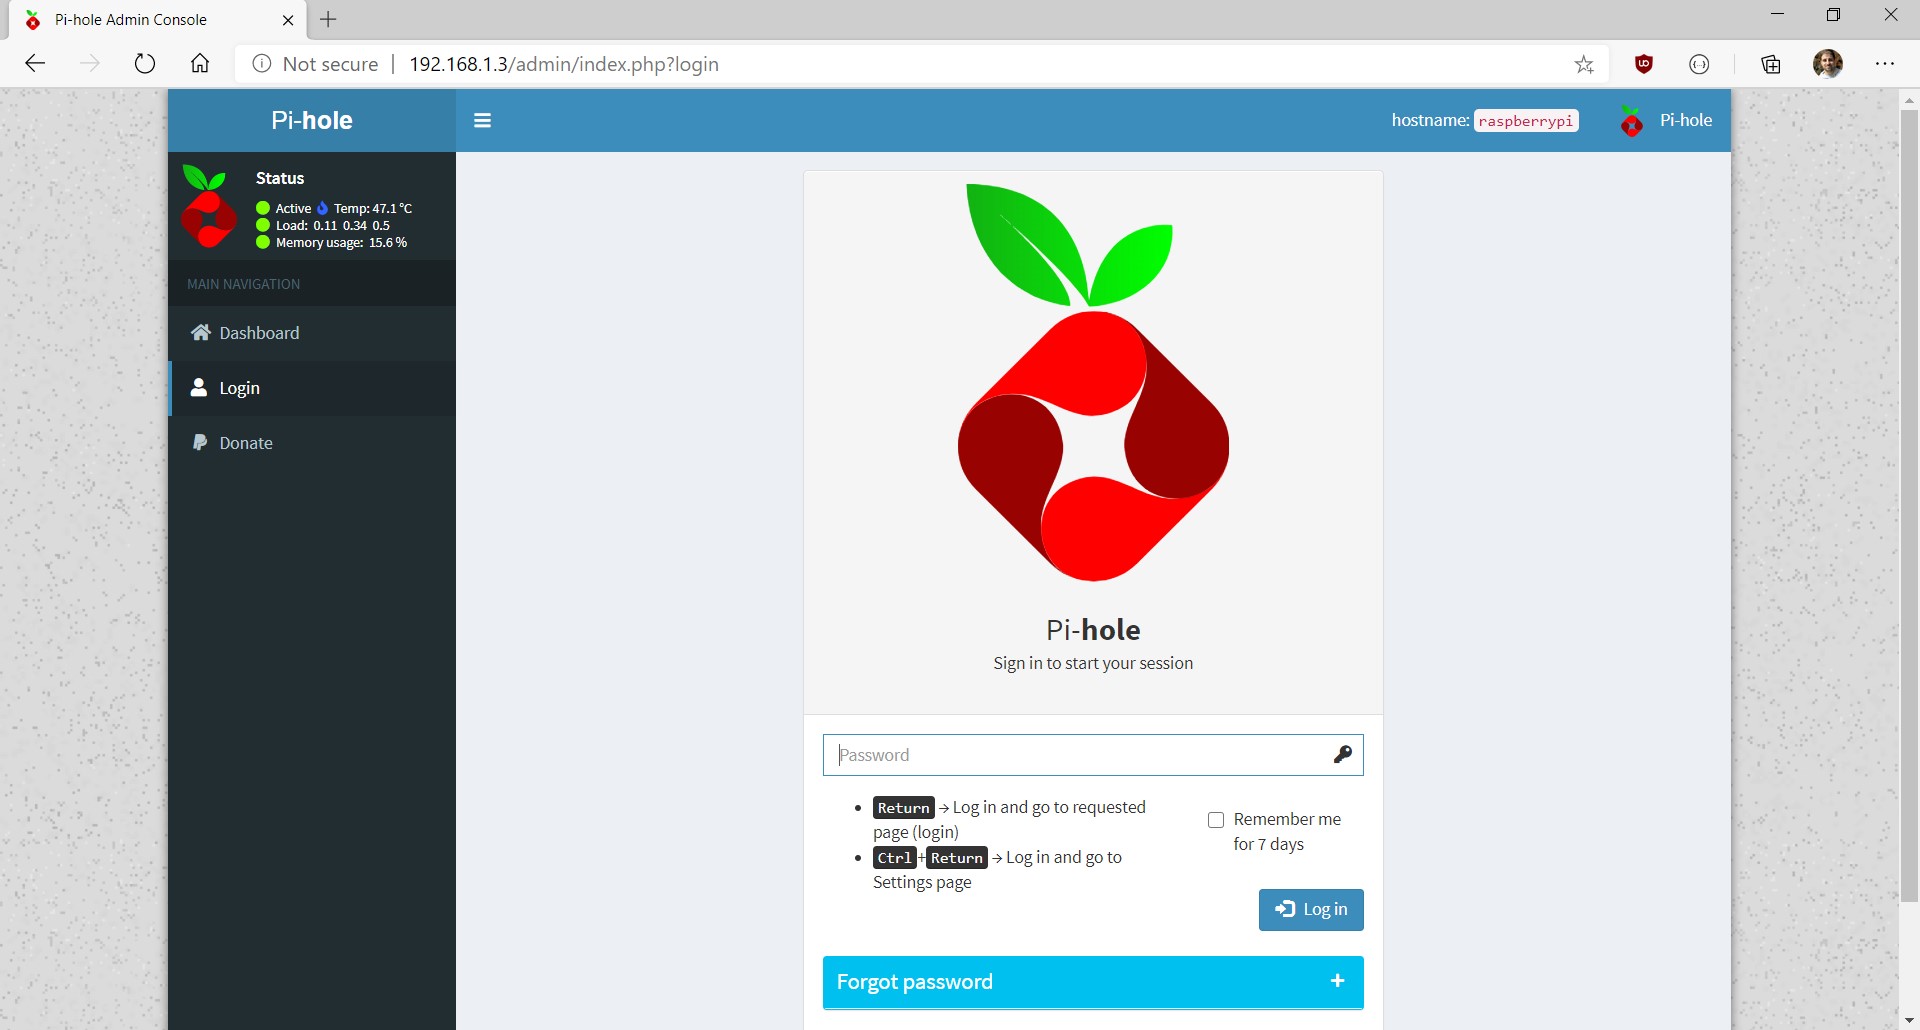
Once inside you will access the data display panel.
Setting up the network
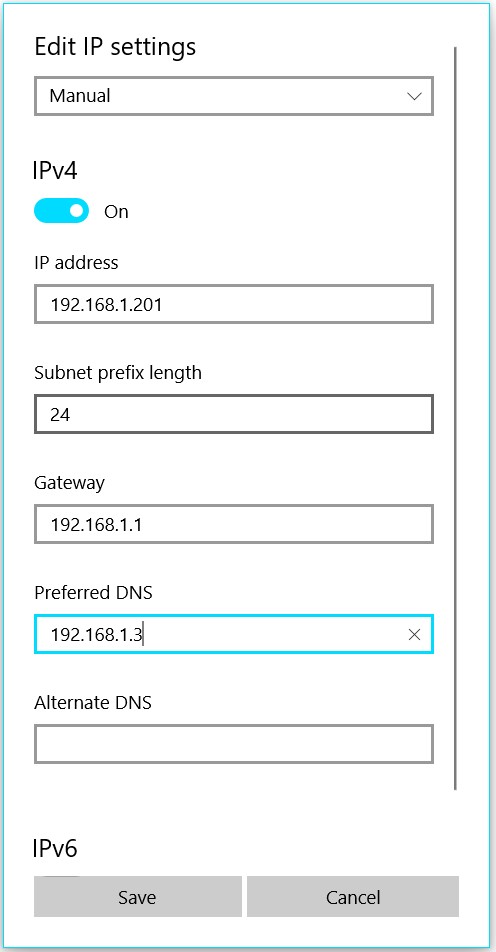
You will have to make all devices on the network have the IP of the Raspberry Pi itself configured as the DNS server address that we have used as the DNS server.
The easiest way is to have Router itself set this IP. To do this, read the manual of your Router, access the section of DNS configuration and change the Internet provider DNS server address with the IP of your DNS server (Raspberry Pi).

When devices with automatic IP are rebooted, they will automatically get the address of the new DNS server. The same for those with a reserved IP in Router.
For those with a static (fixed) IP configured manually on the device itself, the primary DNS must be changed in the configuration.
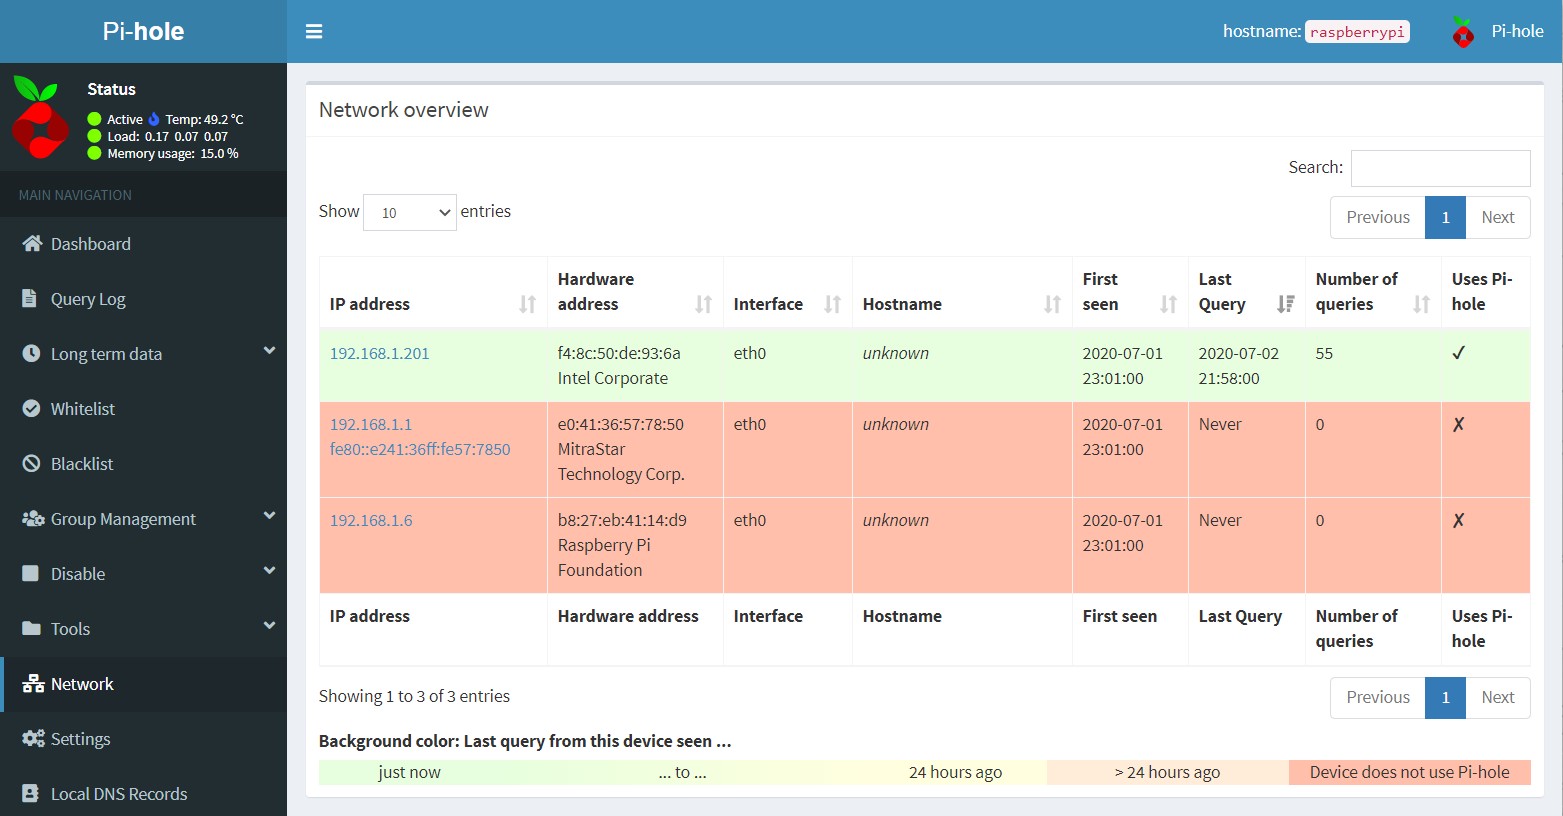
From the Network section of the Pi-hole web panel we can see which devices are connected to the network and which ones are using Pi-hole as a filter.
Updating Lists
From the Group Management -> Adlists section you can modify the lists that Pi-hole uses to allow or block addresses.
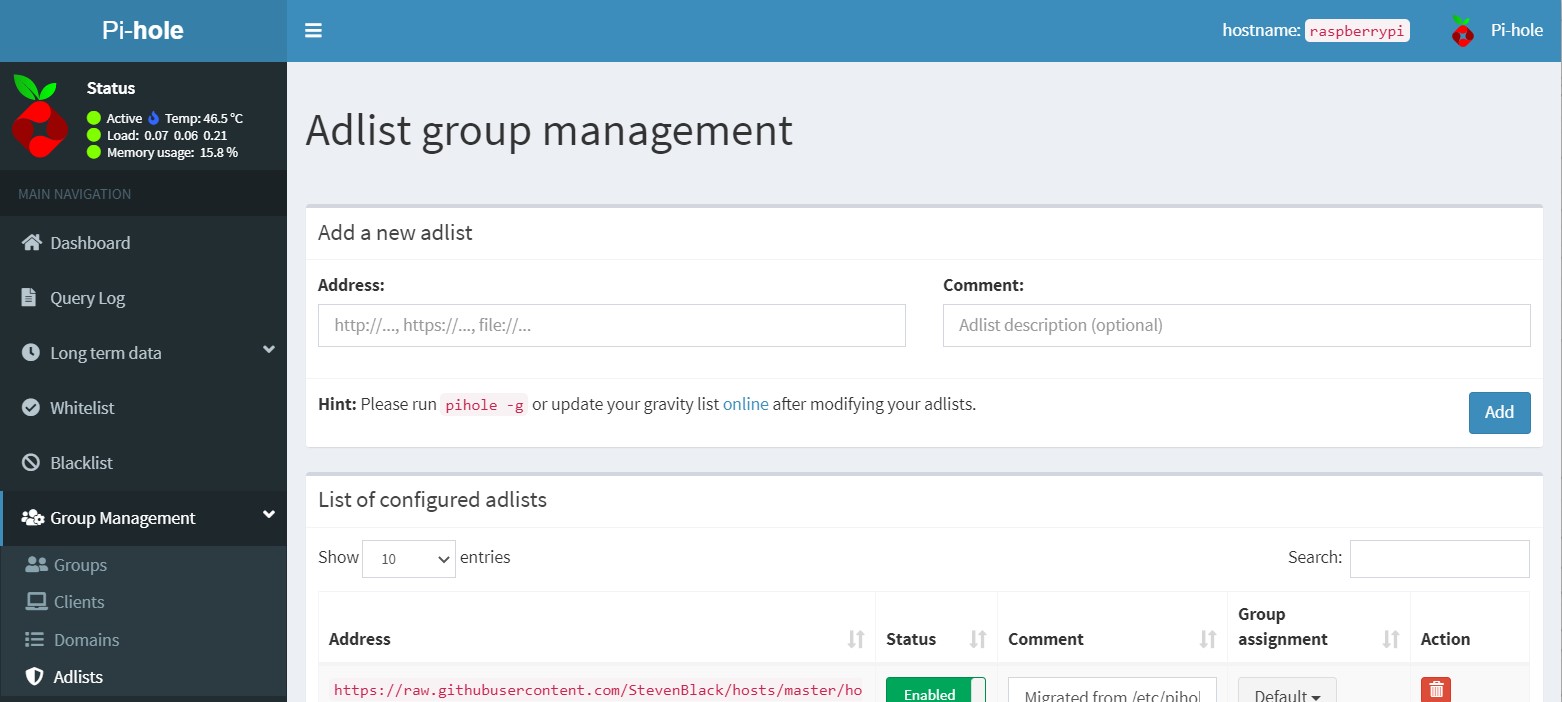
Although there are many websites on the Internet that are dedicated to collecting lists, my personal recommendation is to use the lists that appear in green in Firebog and every few months, go back and check if there are new lists available. The lists themselves are self-updating, so there is no need to reconfigure them, even if contributors add or remove domains within them.
Once changed, it is VERY advisable to click on Tools -> Update Gravity to perform a lists update and compression.
Backing up
One of the most important things once everything is set up is to make backups, so that in case of any critical failure we can make a restore and let everything work again.
Pi-hole makes this task much easier from its Web Panel, section Settings -> Teleporter.
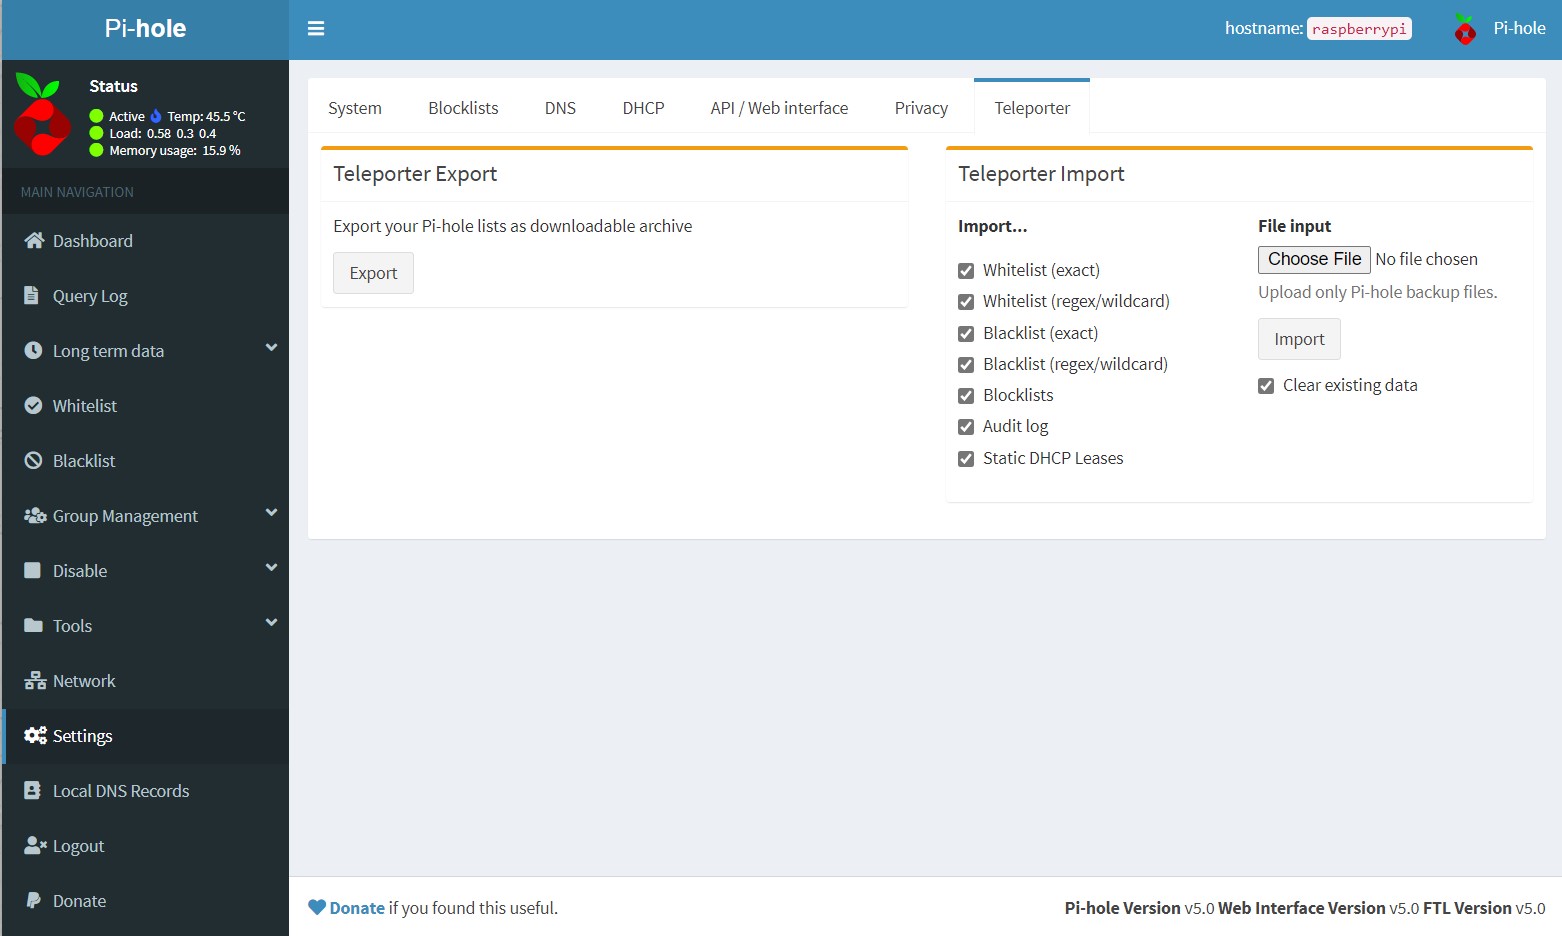
From here, as simple as two options, export configuration and import configuration (or some specific part).
It is recommended to make a backup with every major change or before every update of Pi-hole or the main operating system (Raspberry Pi OS).
Conclusion

From now on your network will be free from malicious domains, especially advertising. Everything in a simple way and without the need to configure each device separately. We have installed Raspberry Pi OS and Pi-hole and there is still much to explore of these tools, but we will see that later.