
Visual Studio Team Services from Console
Computer scientists are vague by nature, in fact, the computer was born with the purpose of sorting information and automate the tasks of sorting and processing data and information obtained from them. Given this fact there is a clear principle:
If you have to do the same task more than once, automate it.
If to this we add the fact that I hate having many open tools, which in turn do many different things, and that perhaps would not have to do for themselves, we enter a state of insanity causing chaos on the developer’s desktop.
Disponible en español aquí
Let’s try to cut the amount of open tools to make it easier and more productive to advance our project with a series of posts.
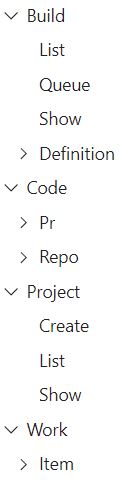
Microsoft Visual Studio Team Services CLI
In the No Country For Geeks team, we use Git and publish code through Pull Request in Visual Studio Team Services. We are not going to enter into why the Pull Request is one of the best ways to advance the team as a code, commitment to projects and shared knowledge: it is well demonstrated.
To see the list of the Pull Request in which the team works in the different projects, simply access the section https://{account}.visualStudio.com/_pulls. The problem with this page is that it does not have notifications, therefore, despite being a good practice to access the page as soon as you start the workday and review the pending Pull Request of your team, it is true that in an 8-hour day they can arise a lot of Pull Request and at the end you always have the page open.
What we do so far is to have notifications with some alerts via email, which is currently what Microsoft allows in its tool. However, we can tell you about emails, in most cases we have a rule that all notices that happen in VSTS (Visual Studio Team Services) are passed to a silenced folder that is reviewed every several days because they are not notices as important as to take them into account.
As I said we use Git, and also as we are purists we usually use the console to perform commands on the repository. And if we do not need to have open the electronic mail, nor the web browser to make the query of the Pull Request pending of the team? Microsoft Visual Studio Team Services CLI joins the game.
VSTS CLI is a new command line interface for Visual Studio Team Services (VSTS) and Team Foundation Server (TFS) 2017 Update 2 and later.
What this means. Well roughly it is an interface for our console that adds extra functionalities to work with Visual Studio Team Services and Team Foundation Server.
Installation
VSTS CLI has Cross-Platform support for Windows, Linux, MacOS and Docker image, and to install it we just have to follow this link. In Windows the installation is as simple as downloading and running an installer.
Once installed, we can open our favorite console and execute the following commands. If we receive a list of available commands, the installation has been successful:
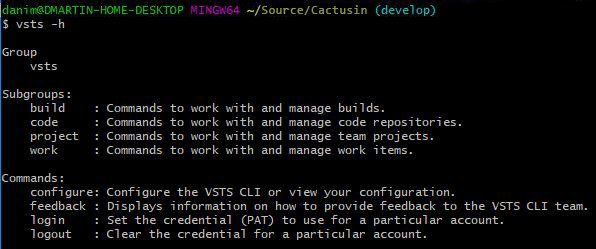
vsts -h
vsts code -h
Logging in
In order to access the information contained in the instance of Visual Studio Team Services in which we usually work, we need to log in, for this we can execute the following command:
vsts login --instance https://MYACCOUNT.visualstudio.com --token MYTOKEN
To obtain the necessary token, simply access the security section of our account in the VSTS instance and request a Personal Access Token. More information here.
If we want this instance to be the one used by default, we just have to use the following command:
vsts configure --defaults instance=http:/MYACCOUNT.visualstudio.com
Global parameters
Before goes into the subject and describe some of the most interesting commands, it is convenient to detail some parameters commonly used in most commands that will come great to obtain the best performance to the tool.
--debug
Increase the detail level of the response with debug data.
--help -h
As is already common in console commands, it shows help about the command that is running.
--output -o
Details the output format of the command. These could be:
-
json: Text in json. By default. -
jsonc: Text in json with colors (may not work in some consoles). -
table: Table format with columns for easier reading. -
tsv: Format separated by tabulator.
You can change the default output by running vsts configure --default-output [json, jsonc, table, tsv]
--query
JMESPath query. in http://jmespath.org/ you have more information and examples.
--verbose
Increase the level of detail. But without debugging data, use --debug if that’s what you need.
All ready
We have everything ready to make queries and obtain the information that interests us, for this we have the Reference section of the documentation.
Some examples:
-
See all the Pull Request of a project (in a friendly way):
vsts code pr list -p PROYECTO -o table
-
Open a Pull Request in the browser:
vsts code pr show --id 5661 --open -
Approve a Pull Request:
vsts code pr set-vote --id 5661 --vote approve -o table
-
See a list of all the repositories of a project:
vsts code repo list -p PROYECTO -o table
-
See a list of all the team’s projects:
vsts project list -o table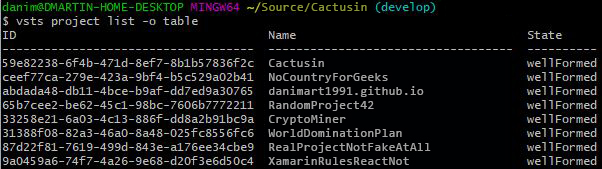
-
Create a Work Item in a project:
vsts work item create --title "Login has a bug." --type "Bug"
And these are just a few examples.
As we can see we can easily move through Visual Studio Team Services without having to access the browser, or have other windows open. As with everything, it takes practice to get all the available commands and agility in its use, but once it is achieved it is quite simple and you can do most things that are done on a day-to-day basis without having to open other tools.
One more thing
I leave you a couple of notes that can still improve our developments.
Use VSTS CLI with Git
Since in many cases what happens is that we simply want to unify Git with VSTS making a union through the Pull Request, we can add aliases to Git to perform this management in a simple and fast way. To do this, we just have to execute the following line:
vsts configure --use-git-aliases yes
With this, we can execute the git pr command and translate it into vsts code pr with all its variants, for example:
vsts code pr create --target-branch {branch_name}
can be written as:
git pr create --target-branch {branch_name}
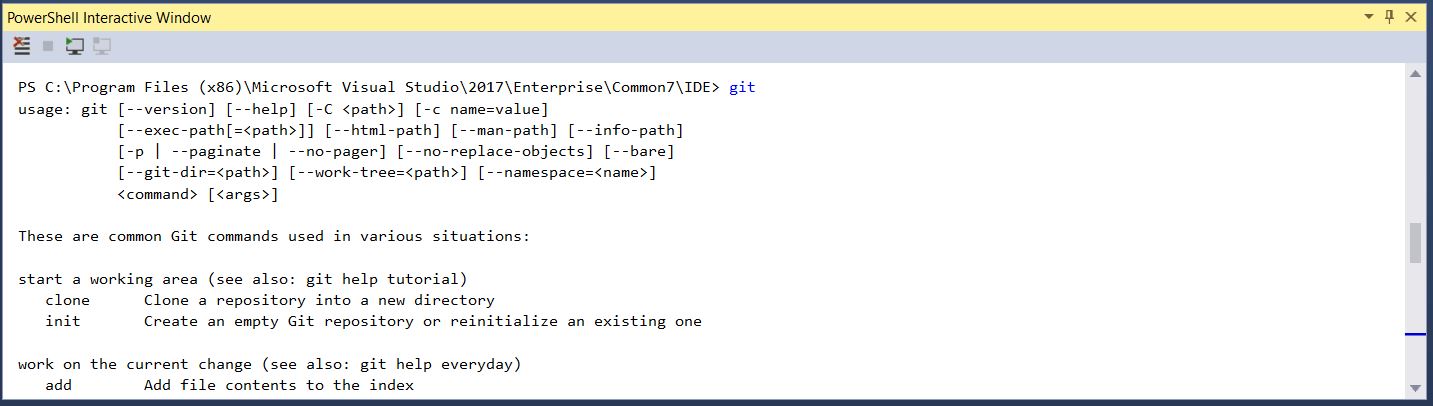
Using the console from Visual Studio
If in addition to everything done, we want to remove one more window. We can include a console with all these commands in our favorite development IDE Visual Studio. To do this, just install the PowerShell Tools for Visual Studio using the Visual Studio installer.
Next, open Visual studio and access the menu View -> Other Windows -> PowerShell Interactive Window.
From this window we can execute any git or vsts command.