
Security camera with Raspberry Pi
Raspberry Pi (in all its versions) is one of the most powerful and versatile microcomputers of the moment. Thanks to the community you can get almost anything, and today, we are going to see how to turn it into a powerful security camera that has nothing to envy to those available in the market at much higher prices.
Disponible en español aquí.
Materials
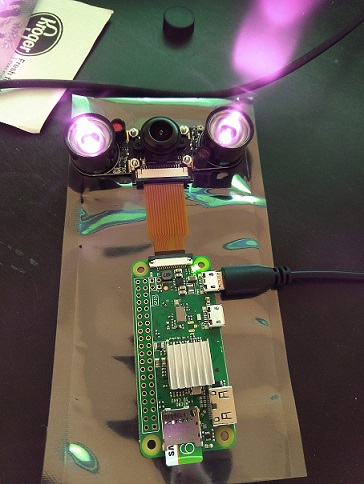
I have a Raspberry Pi Zero W Kit and a clonal camera, but as it’s hard to find nowadays, we can look for another alternative. It is advisable to buy a pack with heatsink and/or fan, since the graphic and processor load that a surveillance camera involves makes it hot. It is advisable to put the camera out of the box for the same temperature problem. An example of what we can buy:
- Raspberry Pi 3 B+ Kit with SDCard, heatsink, charger, case…: https://amzn.to/2qn3wLA
- RPi Noir V2 camera with night vision (official): https://amzn.to/2rePix1
- Case for the camera: https://amzn.to/2NEoM7R
The assembly is quite simple as Raspberry Pi itself has a specific connector for cameras.
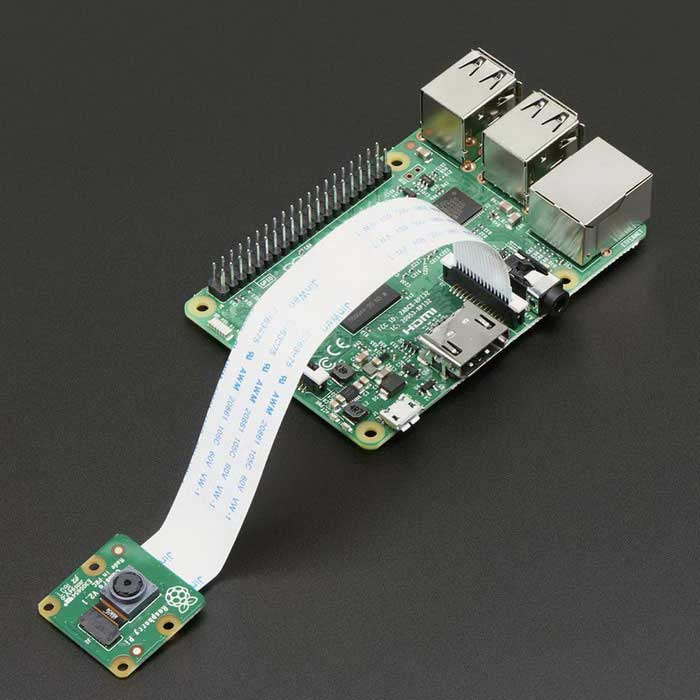
Some USB Webcams are compatible with the operating system we are going to install. If you have any available, such as installation are 5 minutes, you can try.
motionEyeOS
Although there are many operating systems and software for the task at hand. After trying several, in my opinion, the one that has a more active active community, more user-friendly and also powerful is undoubtedly motionEyeOS.
motionEyeOS is a Linux distribution, which is based on BuildRoot, uses motion as a backend and motionEye as a frontend. An advantage because we save unnecessary configurations, and we have everything we need packaged for our project.
Preparation
-
Download the image according to our device of https://github.com/ccrisan/motioneyeos/releases
-
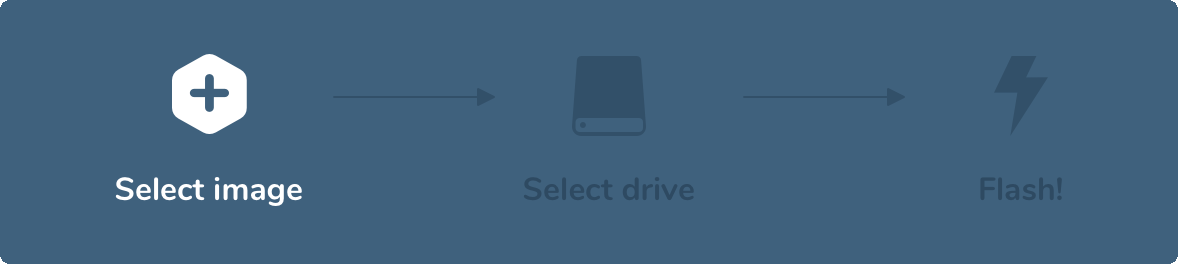
Using balenaEtcher, burn the image into the microSD card.
-
If you want to use a WiFi connection, it is necessary to configure the network first. Once the image is burned, open the device with the file explorer (it is possible that we have to eject and reintroduce the card in the computer) and create the file
wpa_supplicant.conf. Inside include the following code (replacing the necessary variables):update_config=1 ctrl_interface=/var/run/wpa_supplicant network={ scan_ssid=1 ssid="WIFI_NAME_SSID" psk="WIFI_PASSWORD" } -
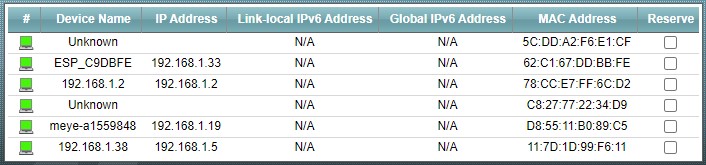
Insert the card into the Raspberry Pi, turn it on and wait… After a few minutes, we look for in the Router connected devices list for our device to know its IP.
First run
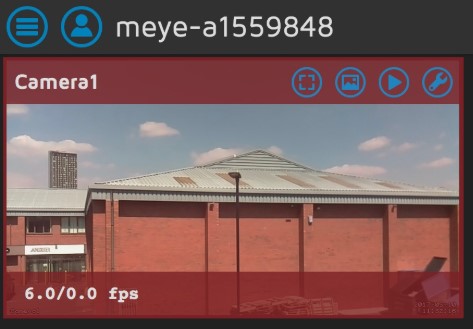
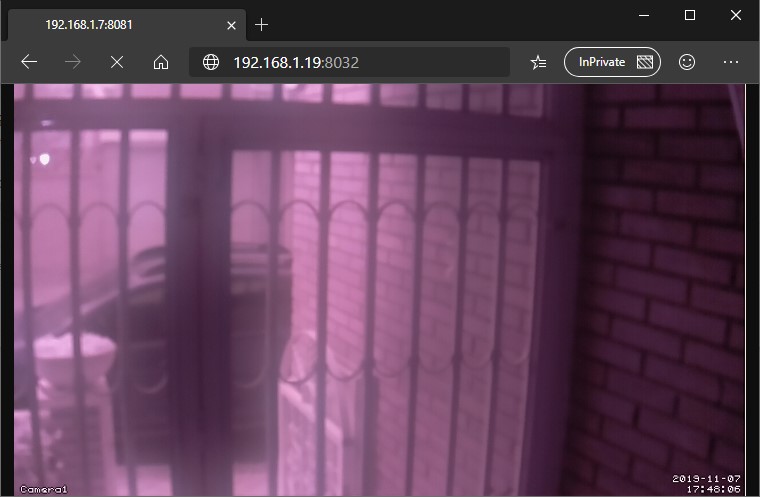
Access the IP you have just found with a Web browser from your computer and it will show us an image similar to this one:
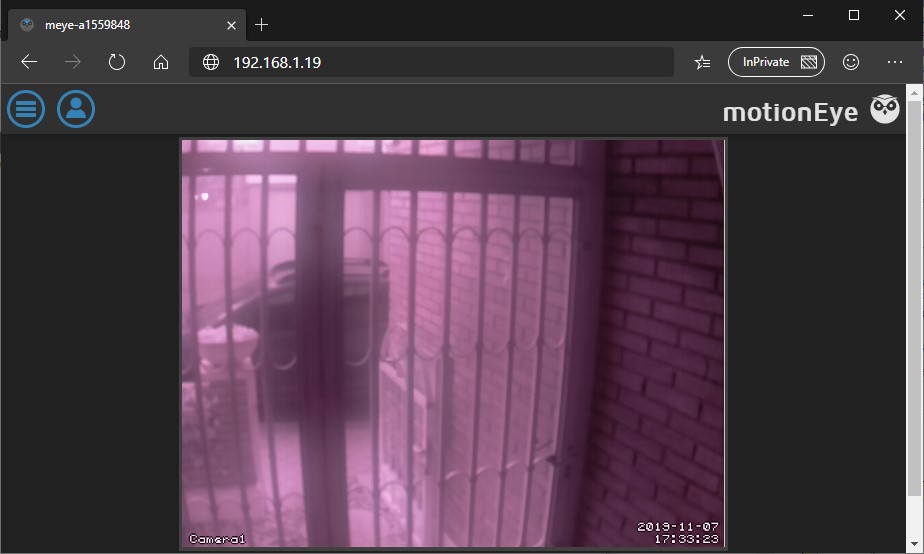
If the camera image is not displayed, it is possible that the device is far from the WiFi access point, or that you have connected the camera incorrectly to the Raspberry Pi.
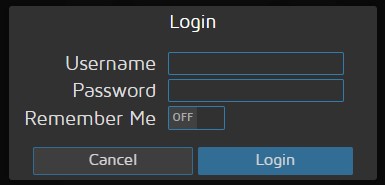
To start configuring the system, click on the person icon at the top left and log in with the admin user, leaving the password field blank.
If we click on the “hamburger” menu at the top left we will be shown several options.
Basic settings
motionEyeOS needs small basic configurations to ease future access, secure the system and leave everything ready for more advanced uses.
-
Change the TimeZone field to the one corresponding to your country.
-
Add a password to users
adminanduser. The first one will give us access to all the configurations, the second one is the user that we should use when we only want to see the camera, but not to configure it.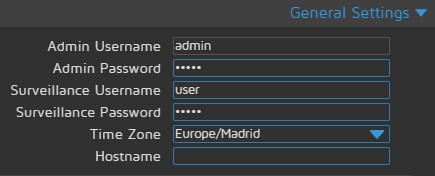
-
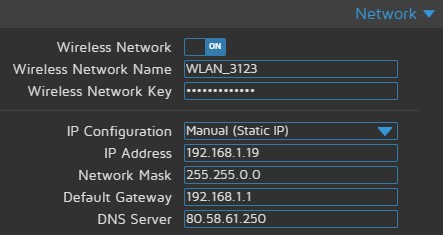
Change the network configuration to assign a manual IP to the system. Optionally an IP can also be reserved from Router.
-
Reboot.
-
Once restarted, Enter again with the IP and
adminuser that we just configured and click on Check yo update the system.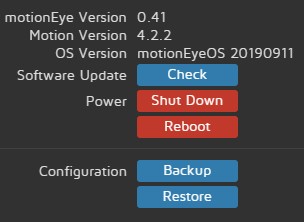
Advanced configuration
Now we will make the necessary settings to optimize the system and activate the video Streaming.
-
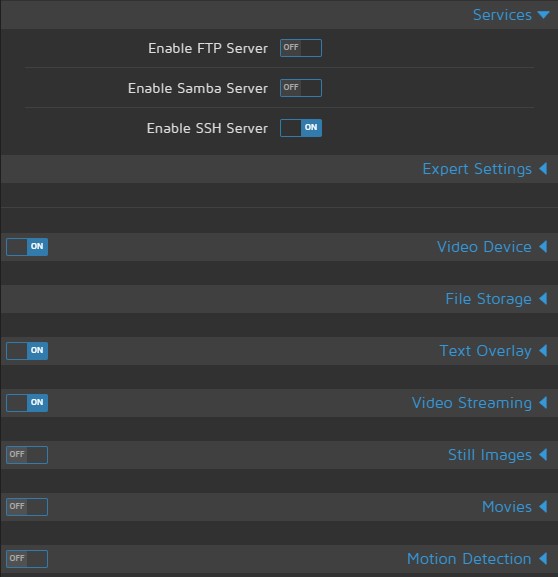
First we will activate or deactivate only the services we want to use. For the moment, I’m only interested in keeping the SSH (in case something fails to access by terminal), Video Device, Text Overlay and Video Streaming services.
-
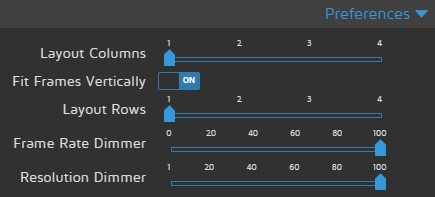
Since we only have one camera in the system, let’s put a single row and column in the interface.
-
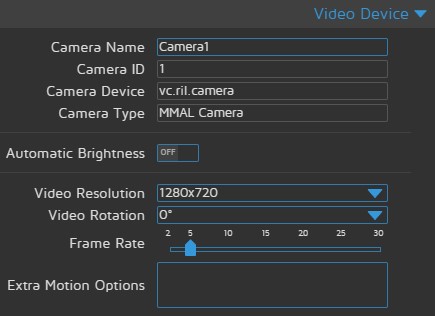
Let’s configure the input image according to the hardware we’re using. Since it depends on the device, as well as the camera connected, the ideal is to play with the values. For the case of my Raspberry Pi Zero W and the clonic camera I use, I have set a resolution of 720p (1280x720 pixels) and a frame rate per second of 5.
-
Finally, within Streaming, configure the same resolution and frame rate per second that we have indicated before (or the one you are most interested in), a basic security and a port.
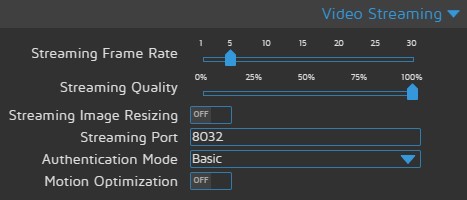
With this last point we will be able to access the Streaming using the Url and port from any Web Browser using the credentials of the user user.
Home Assistant integration
Once Streaming is configured, integration with Home Assistant is very simple. Simply modify the file configuration.yaml and add the following lines (replacing as appropriate):
camera:
  - platform: mjpeg
    name: Example Camera
    mjpeg_url: http://XXX.XXX.XXX.XXX:XXXX # Streaming Url
    username: user
    password: USER_PASSWORD
    authentication: basic
This will create the entity camera.example_camera on our Home Assistant server. To show it in the interface, if we have Lovelace in edit mode we can use the Picture Entity card:
type: picture-entity
entity: camera.example_camera
Conclusion
We have seen how in a few simple steps we have basically and cheaply configured a security camera and its integration with Home Assistant. We still have to see all the potential available by motionEyeOS, but we’ll leave that for later articles.