Make your own smart devices with ESPHome
ESPHome is a framework (software module) to control ESP8266/ESP32 modules in a very simple but powerful way and create smart devices. In the same way, it allows to modify the system of other devices that use these modules, such as for example the Sonoff family, to make them much more powerful and versatile.
There are other alternatives to ESPHome such as Espurna or Tasmota, all quite similar. In the end the goal is to be able to configure your own devices and purchased devices to avoid using external servers and applications such as Tuya Smart Life or eWeLink and add more functionality.
To follow this article, it is advisable to have basic knowledge of electronics, as well as being informed of the device to be built. However, I will be happy to answer any questions, just ask in the comments.
Installation
ESPHome is very simple to operate. By using YAML configuration files, the device is configured and the desired features are added, the compiler generates a binary file that will be put into the device and will replace the previous firmware. All this is done through ESPHome itself. Therefore, contrary to other alternatives, it’s necessary to install it. There are several installation methods:
- Installation on a Linux operating system with a compatible Python environment.
- Docker container installation.
- Hass.io Add-On installation.
All of them have a console interface and a graphic interface. In our case, for convenience, we are going to proceed with the installation of the ESPHome Add-On for Hass.io.
-
As seen in other articles, the installation includes opening our Home Assistant web environment, go to the Hass.io -> Add-on Store section.
-
From this point, and since it is an external Add-on, the ESPHome repository should be included in the list of Add-ons repositories:
https://github.com/esphome/hassio.
-
Once the repository is included, search for and install the ESPHome Add-on.

-
Optionally check the
Show in sidebaroption to display the ESPHome section in the left menu. -
If you are using SSL certificates, specify the certificate files and mark to
truethesslfield in the configuration box.{ "ssl": true, "certfile": "fullchain.pem", "keyfile": "privkey.pem" } -
Save and start the Add-on.
-
Open the ESPHome graphical interface by clicking
OPEN WEB UI.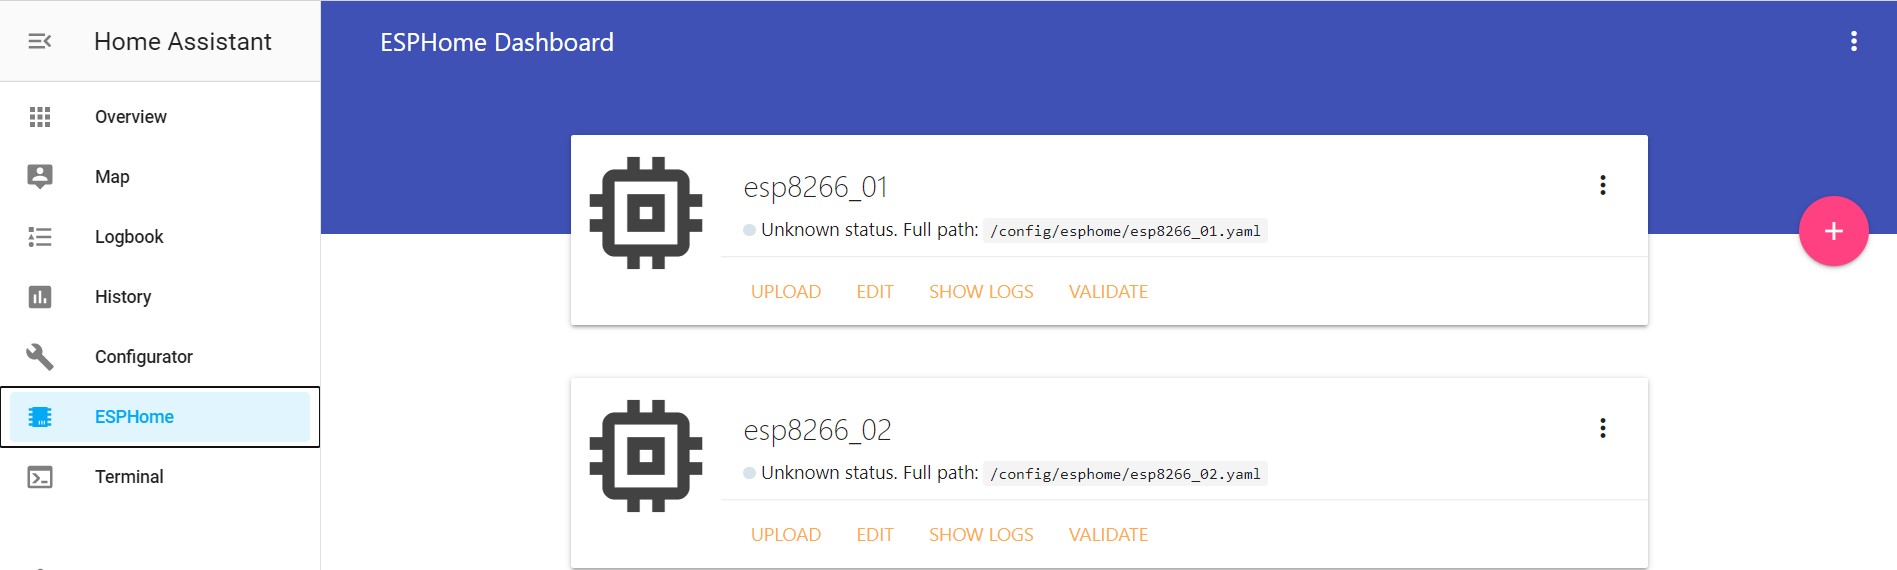
Assembling an example device
Taking advantage of the Xiaomi My Flora sensor that was configured in another article, we are going to proceed to the creation of a first example device. In this case, the sensor will be placed in another point of the house, too far away from the Home Assistant server and its Bluetooth range, without the possibility of linking and receiving data.
The solution is to configure your own device using ESP32 NodeMCU (development board), placed near Xiaomi Mi Flora, which will link via Bluetooth and send the information to Home Assistant using ESPHome API via WiFi.

Once the scheme has been clarified, connect the ESP32 NodeMCU module to the ESPHome server (in our case the Raspberry Pi where we have the Home Assistant server). And restart the ESPHome server from its Add-on page so that it detects the new USB connection.

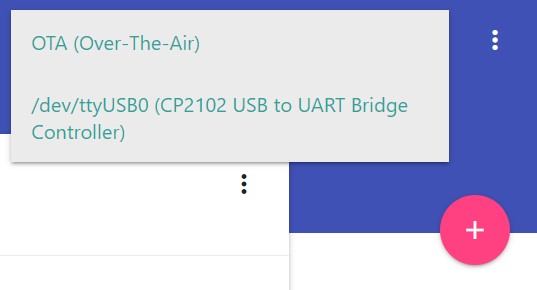
Then select the USB device input you have connected at the top right and click the + button to create a new YAML configuration.
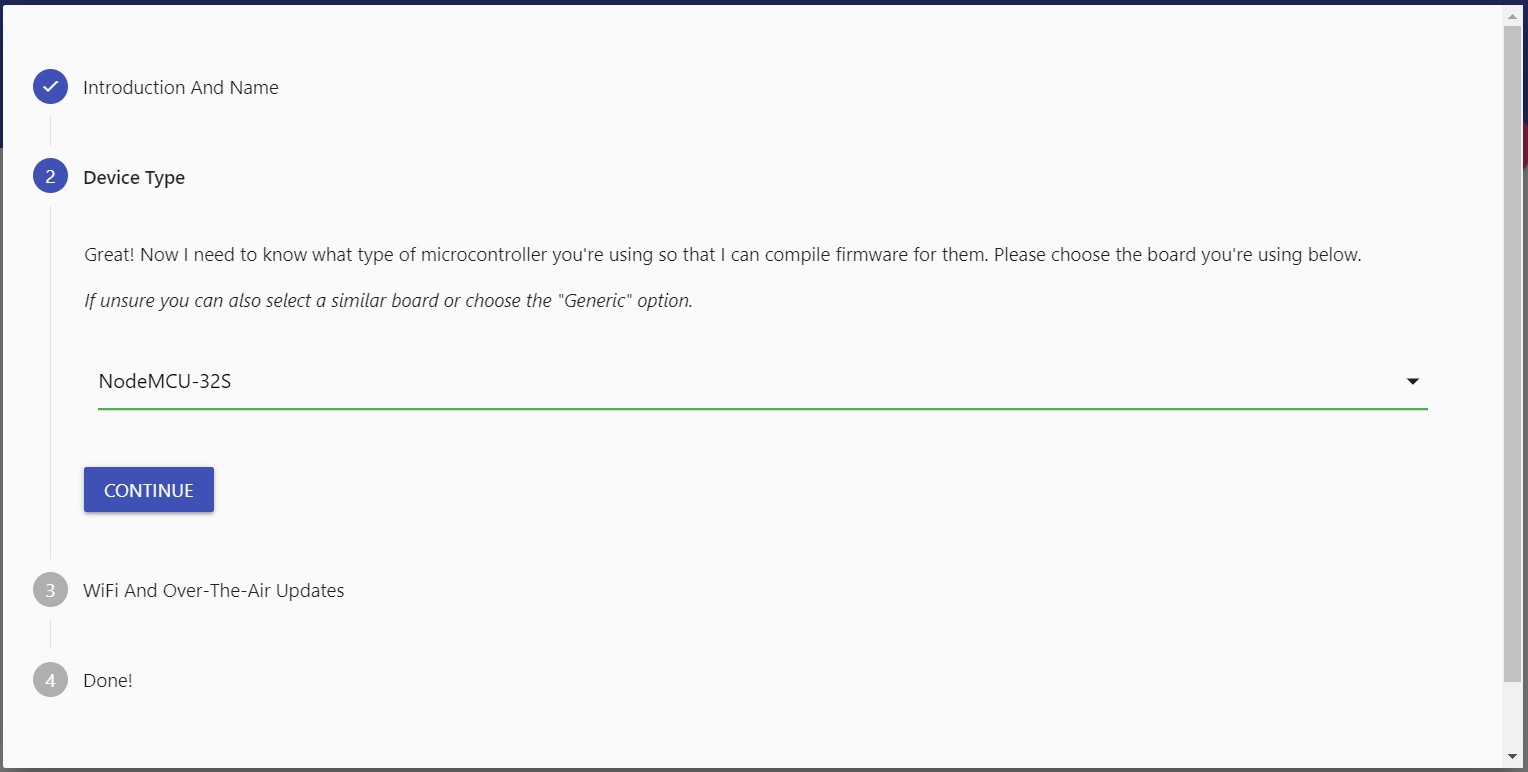
Enter a name and password for your device, the type of board (in the case of NodeMCU ESP-32, choose NodeMCU-32S) and the configuration of your WiFi network.
Click on Submit button.
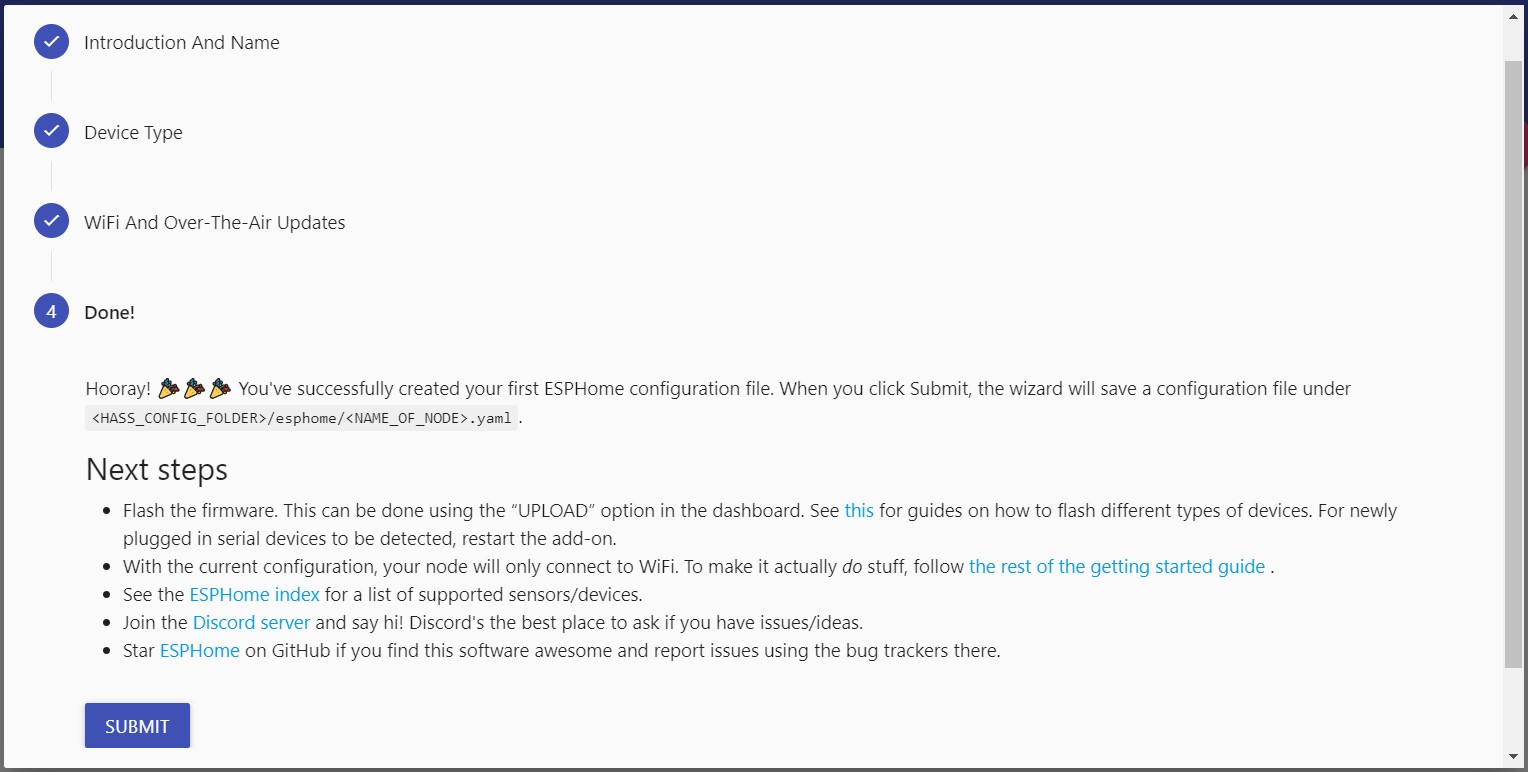
The new device will appear in the list.
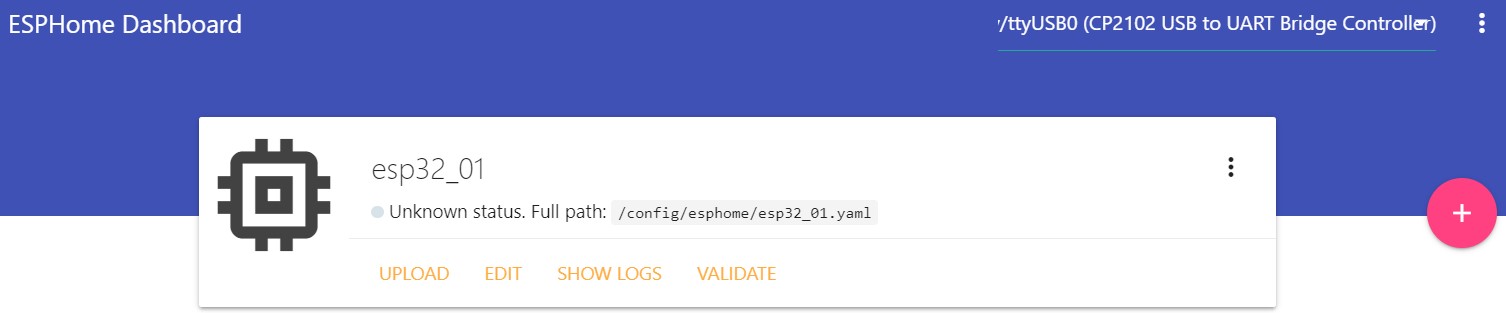
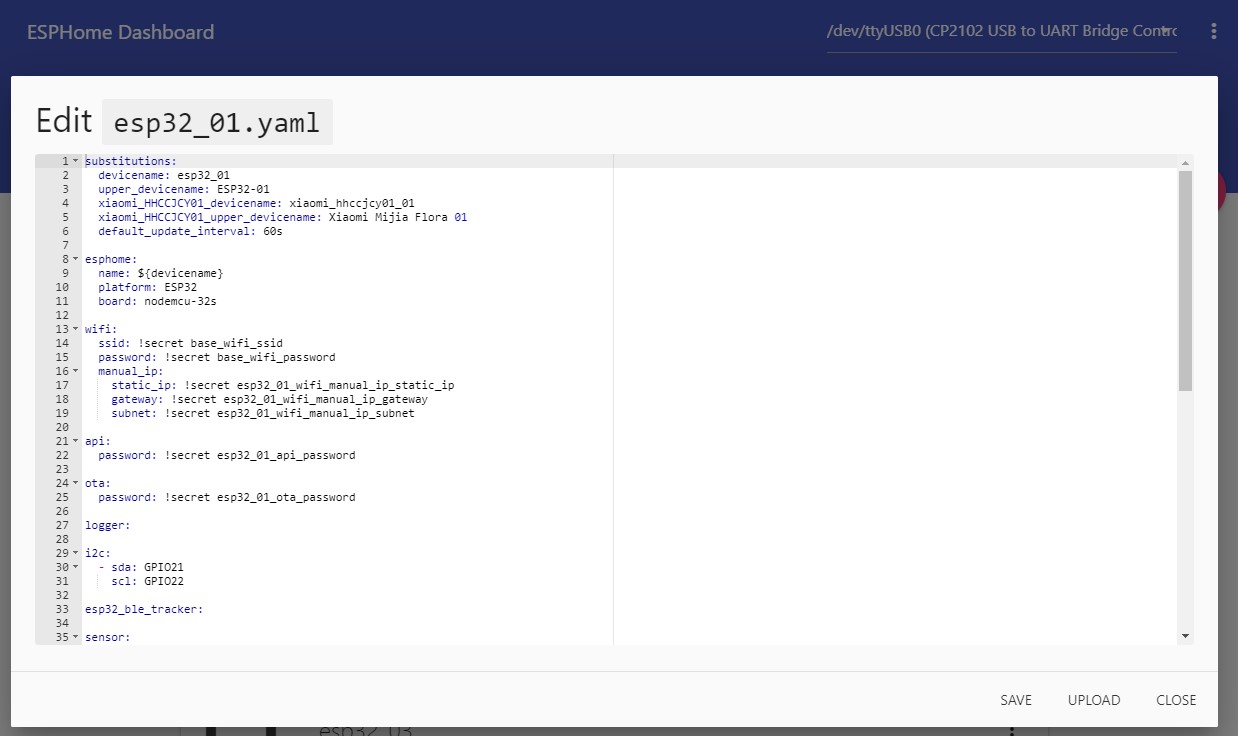
The next step is to complete the YAML file with the desired configuration. The basic configuration and configuration to support the My Flora device is as follows:
# Basic configuration
esphome:
  name: esp32_01
  platform: ESP32
  board: nodemcu-32s

# WiFi network configuration
wifi:
  ssid: WIFI_NETWORK_SSID
  password: WIFI_NETWORK_PASSWORD

# API with Home Assistant
api:

# OTA updates
ota:

# Log of information and errors
logger:

# Bluetooth activation
esp32_ble_tracker:

# Mi Flora sensor
sensor:
  - platform: xiaomi_hhccjcy01
    mac_address: XX:XX:XX:XX:XX # Mi Flora MAC Address
    temperature:
      id: mi_flora_temperature
      name: "Mi Flora Temperature"
    moisture:
      id: mi_flora_humidity
      name: "Mi Flora Humidity"
    illuminance:
      id: mi_flora_brightness
      name: "Mi Flora Brightness"
    conductivity:
      id: mi_flora_conductivity
      name: "Mi Flora Conductivity"
    battery_level:
      id: mi_flora_battery
      name: "Mi Flora Battery"

# Device Status (Sensor)
binary_sensor:
  - platform: status
    id: esp32_01_status
    name: "ESP32 (01) Status"

# Device Status (LED)
status_led:
  pin: GPIO2
Once finished, save the changes with Save button, and making sure you have selected the USB input at the top right, click Upload.
The configuration will be compiled and deployed on the device. Once finished and having the log activated, you will be able to see the data received from My Flora.
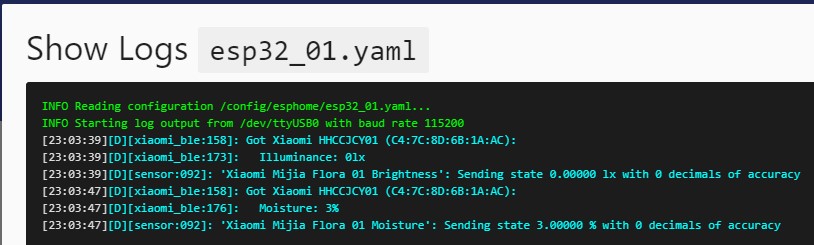
From this moment the deployments can be made using the OTA (Over-The-Air) input without the need to connect the device to the ESPHome server physically.
Home Assistant integration
The device we have just created, mounted and configured already receives data from Xiaomi Mi Flora via Bluetooth, but we want to show this data on our Home Assistant server.
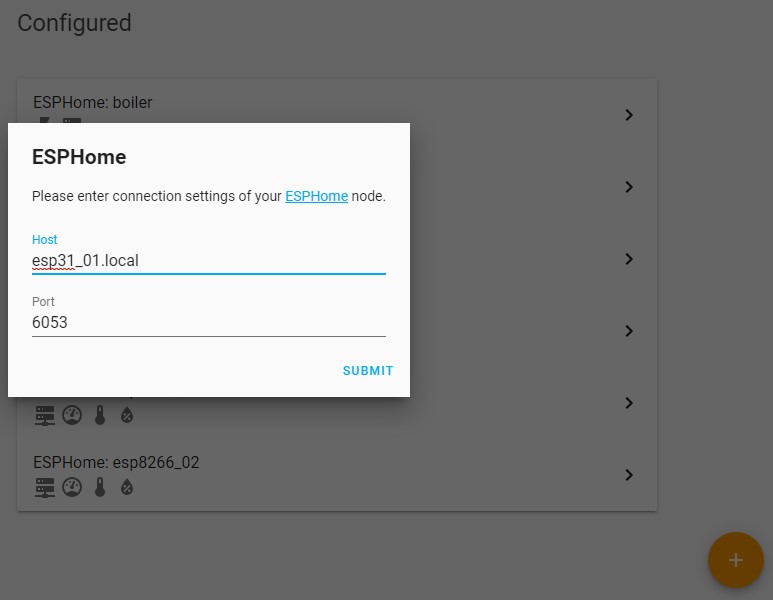
In this case, there is no manual configuration editing the file configuration.yaml. The way to include devices that use the ESPHome API is through the Configuration -> Integrations panel.
From this point, click the + button in the lower right corner, and search for ESPHome. In the box that appears, enter the host name, which is usually the name of the device + .local (esp32_01.local), or the IP assigned by the router, and then click Submit.
If you wish, you can link the device to a room (area).
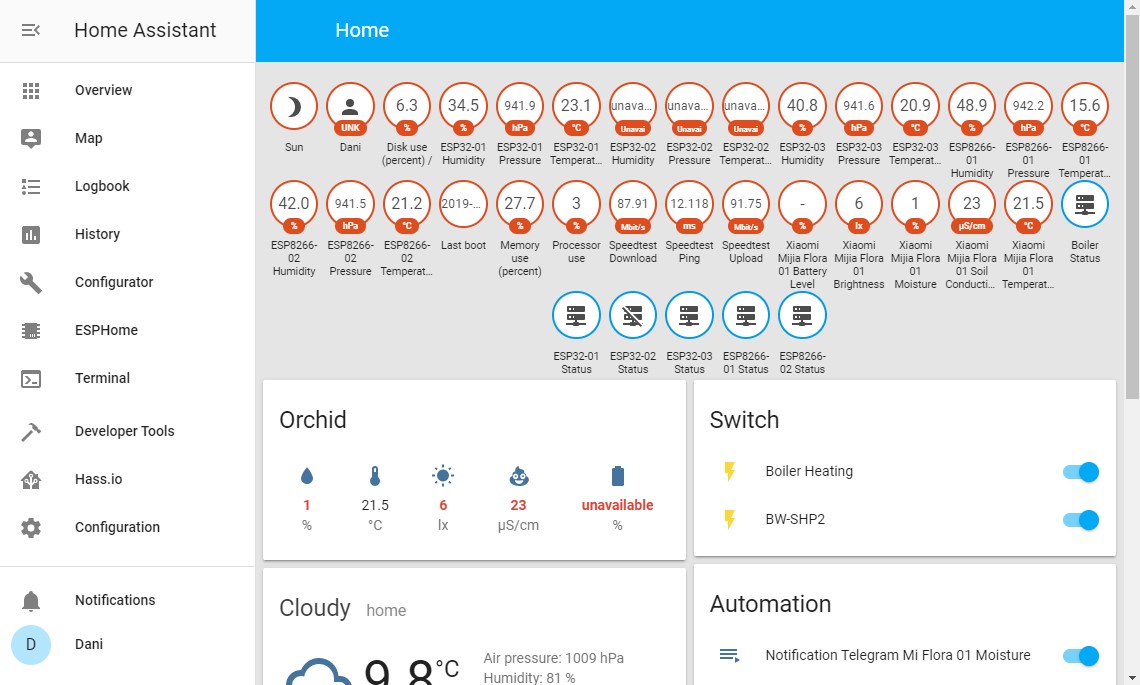
The device will be shown in the list of devices integrated in the server.

Depending on how you’re using the Lovelace visual interface, the sensors will appear automatically, or you’ll have to include them on cards to your liking.
Conclusion
A server has been easily created for configuration and deployment of firmware based on ESPHome for devices sold in stores or made by ourselves. And we have configured a simple device that is able to receive information from another device by Bluetooth and send it to a server with Home Assistant. ESPHome is much more powerful than seen in this article, in Internet you will be able to discover designs that other people make and that you can adapt to your needs and projects in a simple way.
For my part, at the time of writing this article I already have several sensors of temperature, humidity and pressure spread throughout the house. One of them linked as we have seen with Xiaomi My Flora, and a Sonoff Basic device with the ESPHome system that makes it work in the local network and allows to add functionality that otherwise could not be achieved. Any project is possible!
This and other articles complement the documentation of the GitHub repository where all the configuration of my house is available.